mParticle HTTP Integration
Overview
Marigold Engage by Sailthru’s HTTP integration with mParticle enables you to send mParticle events and audiences to Sailthru. To get started, go to your mParticle console and enable the integration. You’ll need to add an Application Specific API Key and Secret, which your Customer Success representative will provide to you.Best Practice: Connecting your account with a third party vendor requires a 3rd party API Key and Secret. For your account security, you should use a different Key and Secret for each integration. Contact support to request an integration-specific Key and Secret.
mParticle forwards the following event types:
- User Attribute Change (creates realtime updates via User API endpoint)
- User Identity Change ((creates realtime updates via User API endpoint)
- Session Start / End (displayed in the platform as mp_session_start and mp_session_end)
- App Events
Audiences in mParticle
Audiences can be synced between mParticle and the platform with Audience Subscriptions and Audience Membership Requests.Audience Subscription Requests
When a new audience is created in mParticle the members of the mParticle audience can be synced to a list.Audience Membership Requests
The Audience Membership request in mParticle will send information about a specific user’s membership of an mParticle Audience. The platform will use this to add or remove a user from a matching list.Events in mParticle
User Attribute Change
A user attribute change in mParticle will be captured to update custom fields (profile vars) in real time.User Identity Change
When a user’s email changes or a new type of ID is added to mParticle that event will be passed to the system. If the email has been changed we will update the user profile while keeping the existing profile history. For example, if you added information about a customer to their mParticle profile when an account on a website was created, then those changes would be passed and they would apply to the user account matching the email address.| mParticle Attributes | User Profile vars |
| added: { “$FirstName”:”Brian”,”$LastName”:”O’Brian”, “$Gender”:”M”, “$State”:”FL”, “$Country”:”US”, “$City”:”Boca Raton”, “$Zip”:”33431″ } | vars : { FirstName : “Brian”, LastName: “O’Brian”, Gender : “M”, State”: “FL”, Country”: “US”, City”: “Boca Raton”, Zip”: “33431” } |
The profile vars will then be available to use in communications with the customer or in Audience builder. Note: Audience Builder cannot search within arrays or objects so if you intend to further refine mParticle audiences in audience builder to pass strings as mParticle attributes. Custom Event Custom event triggers in mParticle will map directly to a custom event. Events can be used to kick off a Lifecycle Optimizer flow. As mParticle custom events can be defined by the customer it’s important to understand the data structure of your mParticle events. mParticle event attributes are converted to event vars and can be filtered in Lifecycle Optimizer Steps to enable workflows based on the attributes passed. Event vars are transient and only available to the event, if you want to store event attributes on the user profile make sure that you pass those attributes via a user attribute change.
Session Start
When an mParticle defined session starts a custom event is sent as a custom event named mp_session_start. Session start events can be used as entry point for a Lifecycle Optimizer flow or add users to a list.NOTE: This is not the same as a session that tracks pageviews, and is not available in Audience Builder. mParticle session start events with an event name called mp_session_start are processed. Take action in Lifecycle Optimizer
Session End
When an mParticle defined session ends a custom event named mp_session_end is sent. Session end events can be used as entry point for a Lifecycle Optimizer flow or to add users to a list.NOTE: This is not the same as a session that tracks pageviews, and is not available in Audience Builder.
Using mParticle Custom Events to start a Lifecycle Optimizer flow.
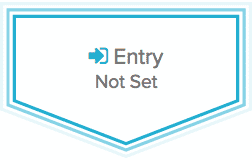
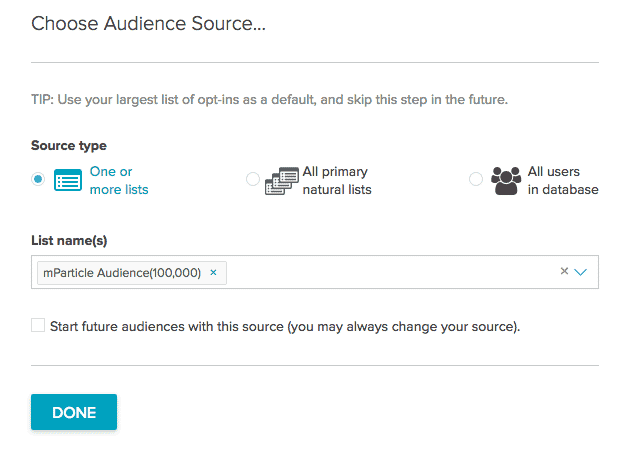
Custom Events that are passed from mParticle can be used to start a flow in Lifecycle Optimizer. For the full capabilities we recommend you read the full Lifecycle Optimizer documentation. Browse to Lifecycle Optimizer in your account. Entry Click New Flow.- Click Entry: Not Set.
- Select an option from the Start this flow when… menu. And choose Event API.
- For the event name choose the name that matches your custom event in mParticle.
- Specify the additional options below the menu for the event. For more details, see the Step Glossary.
- User Profile Custom Field (a.k.a. var) values-set, increment/decrement, or delete
- Send Email using a specified transactional template
- Add to a List
- Remove from a List
- Send a mobile Push Notification
Refining mParticle Audiences
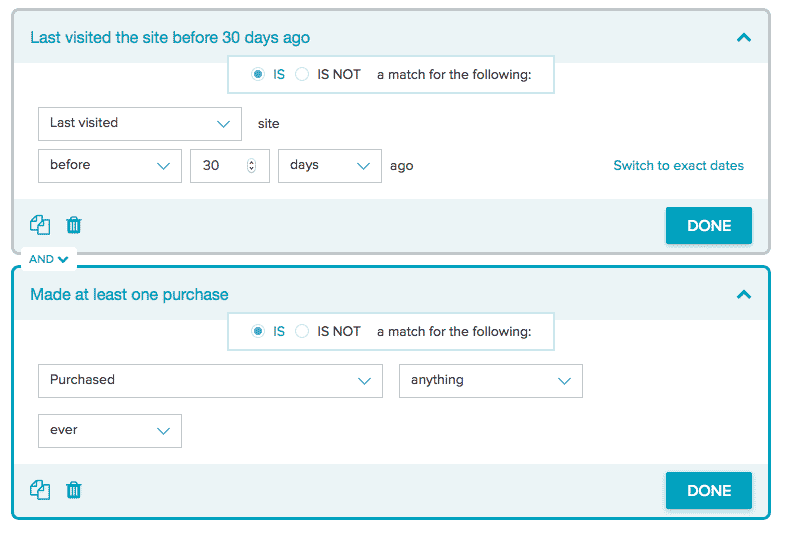
You may have already created your mParticle audience in mParticle but now want to further refine the group of users. Using Audience Builder you can search for users that meet certain criteria. For example, look for a group of users belonging to a specific mParticle Audience that have not visited the website in 30 days. Browse to Audience Builder and create new audience from all users belonging to a list that you have synced from an mParticle audience.
Click done and then on the next screen using the menu on the left click ‘Site Visit” and “Purchased Date, Products”. In the forms you can select options to identify those users who have not been back in a while but have previously made a purchase.
Armed with this information you could potentially target those users on Facebook as part of a win back campaign by creating a list from audience builder and syncing to Facebook Custom Audiences. That’s just one example, for full capabilities of Audience Builder please read the full documentation.