Create High-Value Facebook Lookalike Audiences with Predictions
By using forward-looking predictions, marketers can identify their highest-value customer segments based on what customers are likely to do in the future, rather than just reacting to their past.
Through our integration with Facebook, you can easily:
- Identify a segment of high-value customers with Predictions,
- Export that segment to Facebook as a Custom Audience,
- Find similar users on Facebook with Lookalike Audiences,
- Target your Lookalike Audience with Facebook Ads,
- Track conversions using URL parameters and the User API.
Predictions offers a huge improvement over the recency/frequency model that acquisition marketers have historically used to define high-value customers, and results are especially powerful when combined with Facebook’s Lookalike Audiences prospecting tool.
These instructions require that you have already configured the Facebook Custom Audiences integration.
1. Use Predictions to Generate a High-Value User List
To easily identify existing users who mean the most to your business, use the Predictions interface at my.sailthru.com. You’ll find a number of pre-generated customer segments that will be useful for Facebook Custom Audiences, or you can create your own.
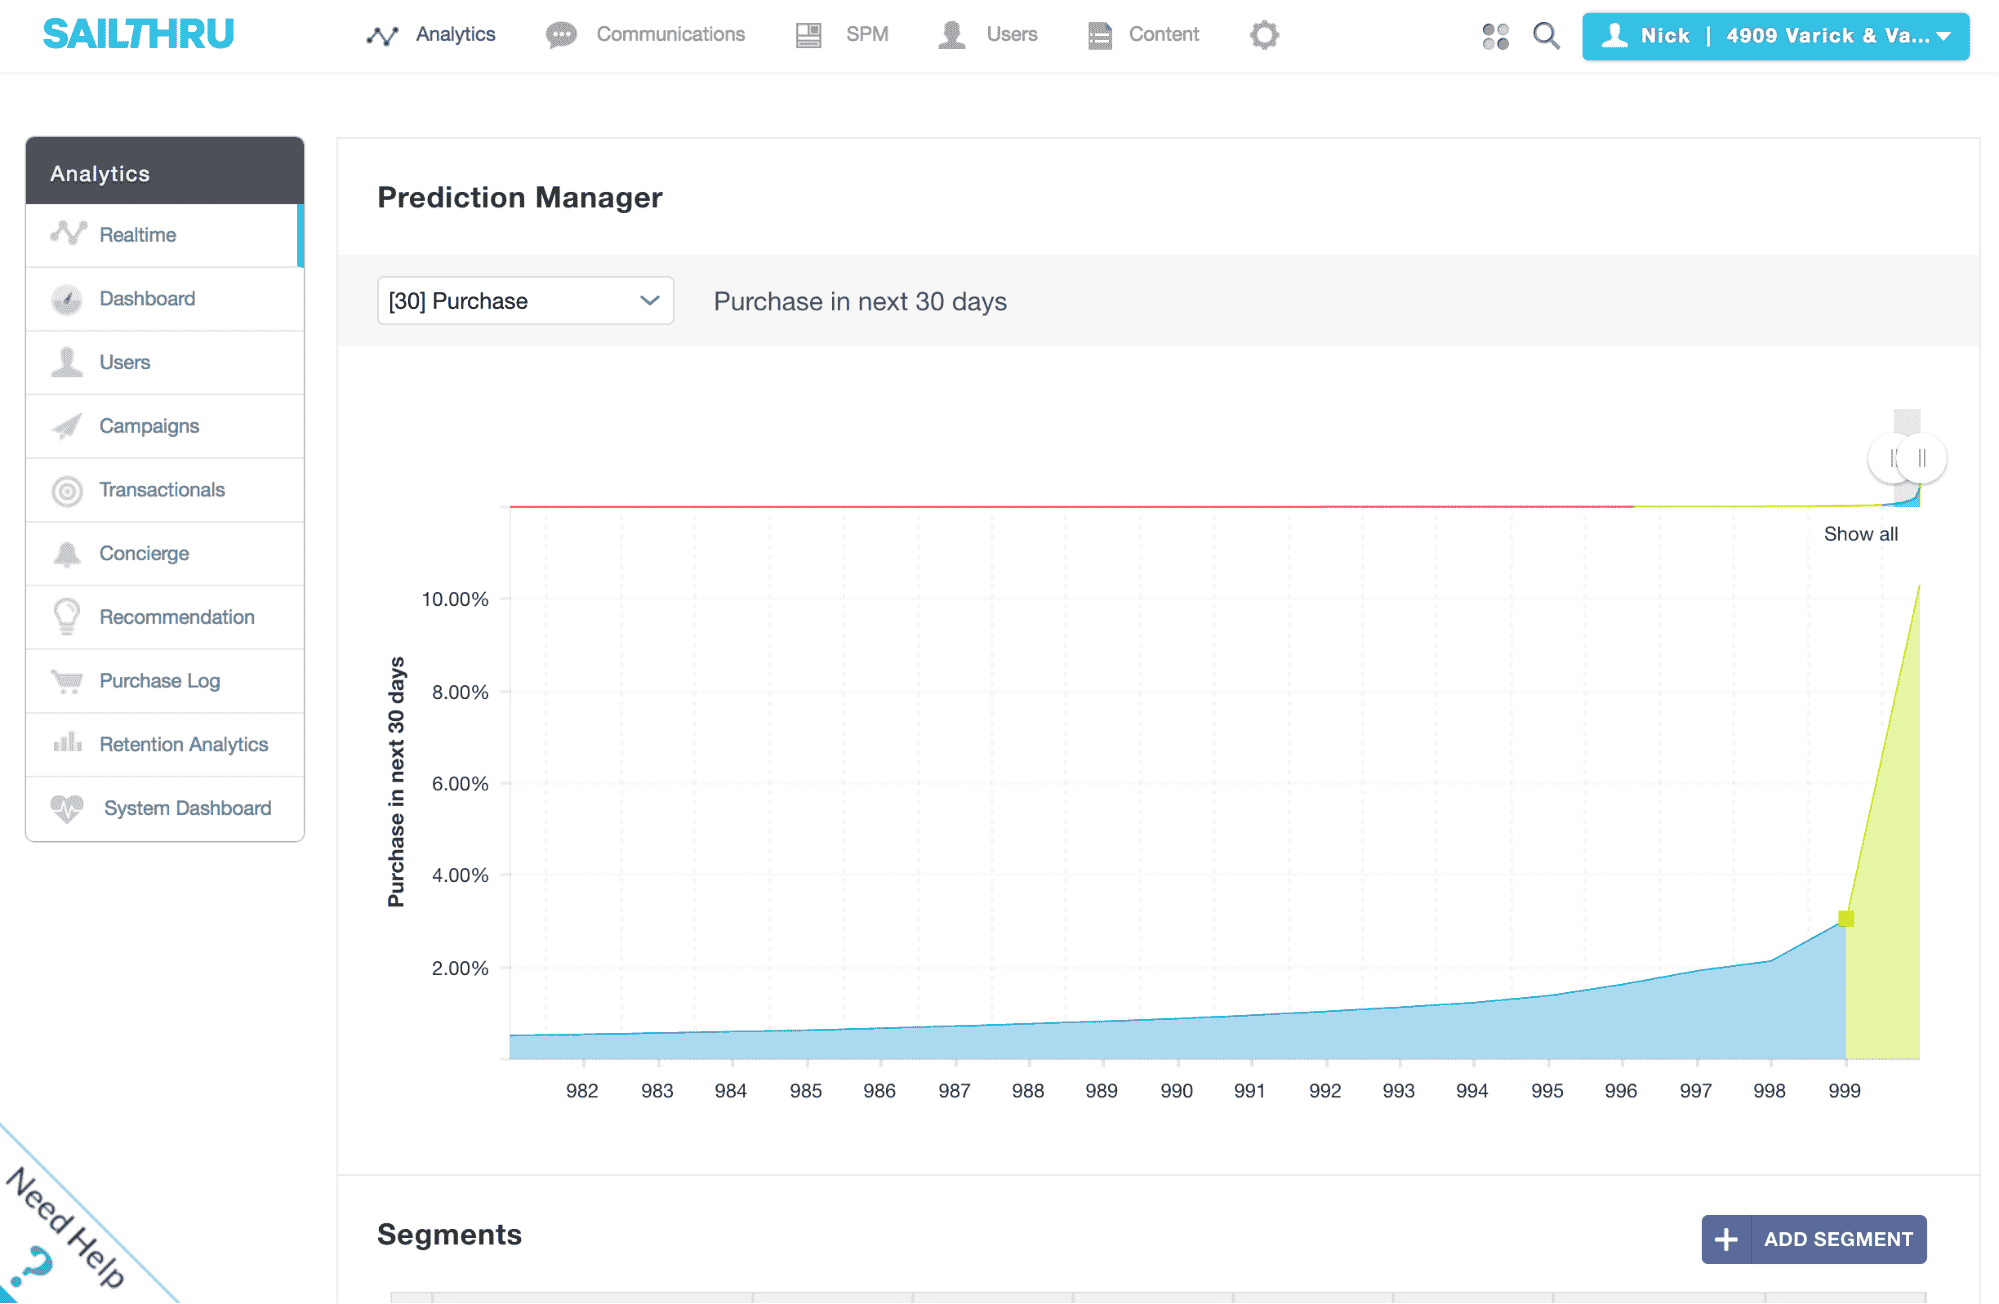
A graph of your customers’ behavior for the selected prediction is displayed, with four default, identified segments based on those predictions. The default view shows ‘[30] Purchase‘ — user’s likelihood to purchase in the next 30 days — but you can use the drop-down to view a variety of other predictions. Each segment is color-coded, and its details are listed in the table below. This data can help guide you on the size of the audience you may want to target on Facebook.
Tip: Use the scrubber icons above the graph to zoom in on your highest-value users and gain a more nuanced view of the top end of the prediction’s distribution.
You can use these pre-built segments or use your own custom range of predicted values to create a custom segment.
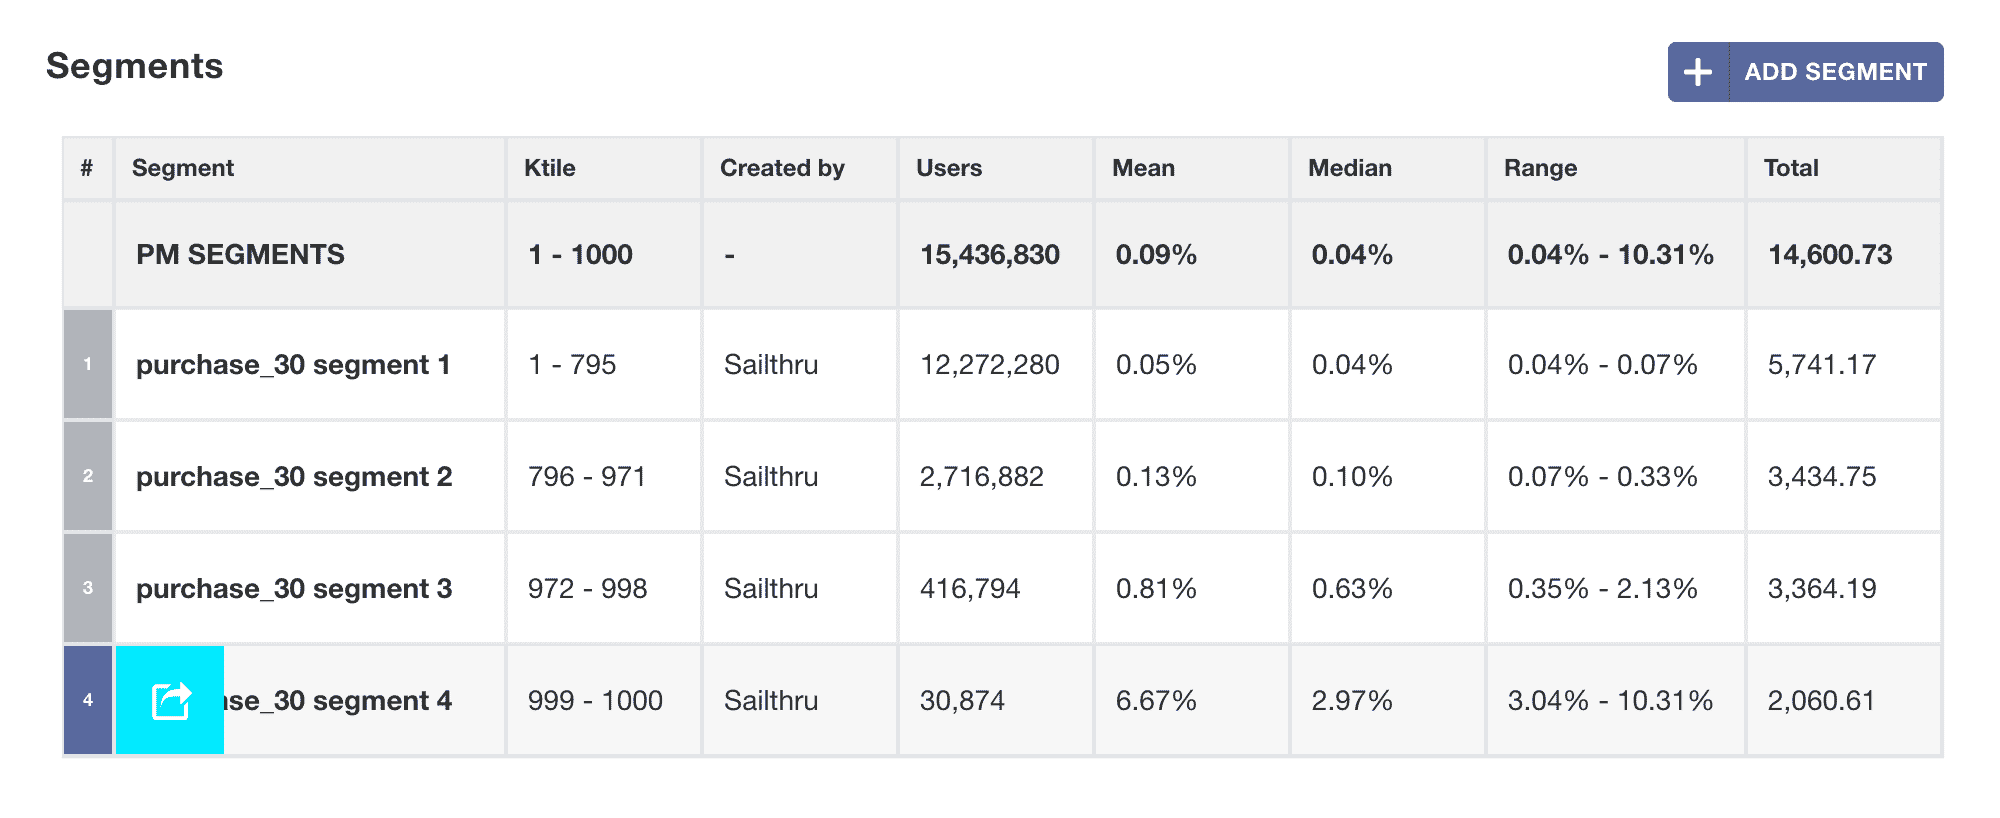
- For e-commerce customers, we recommend starting with the default [30] Purchase view, and using the default segment purchase_30 segment 4 — your users who are most likely to make a purchase in the next 30 days.
- For media customers, change the drop-down (top-left) to display [7] Click (the likelihood to click an emailed link in the next 7 days) or [30] Pageviews (the likelihood to view a page on your site in the next 30 days), and select the top segment, segment 4.
When you have created a segment or identified an existing segment you wish to use as the basis of a Lookalike Audience on Facebook, click the number to the left of the segment name and select the share button.
![]()
Then, select Smart List as the destination for this segment’s user list.
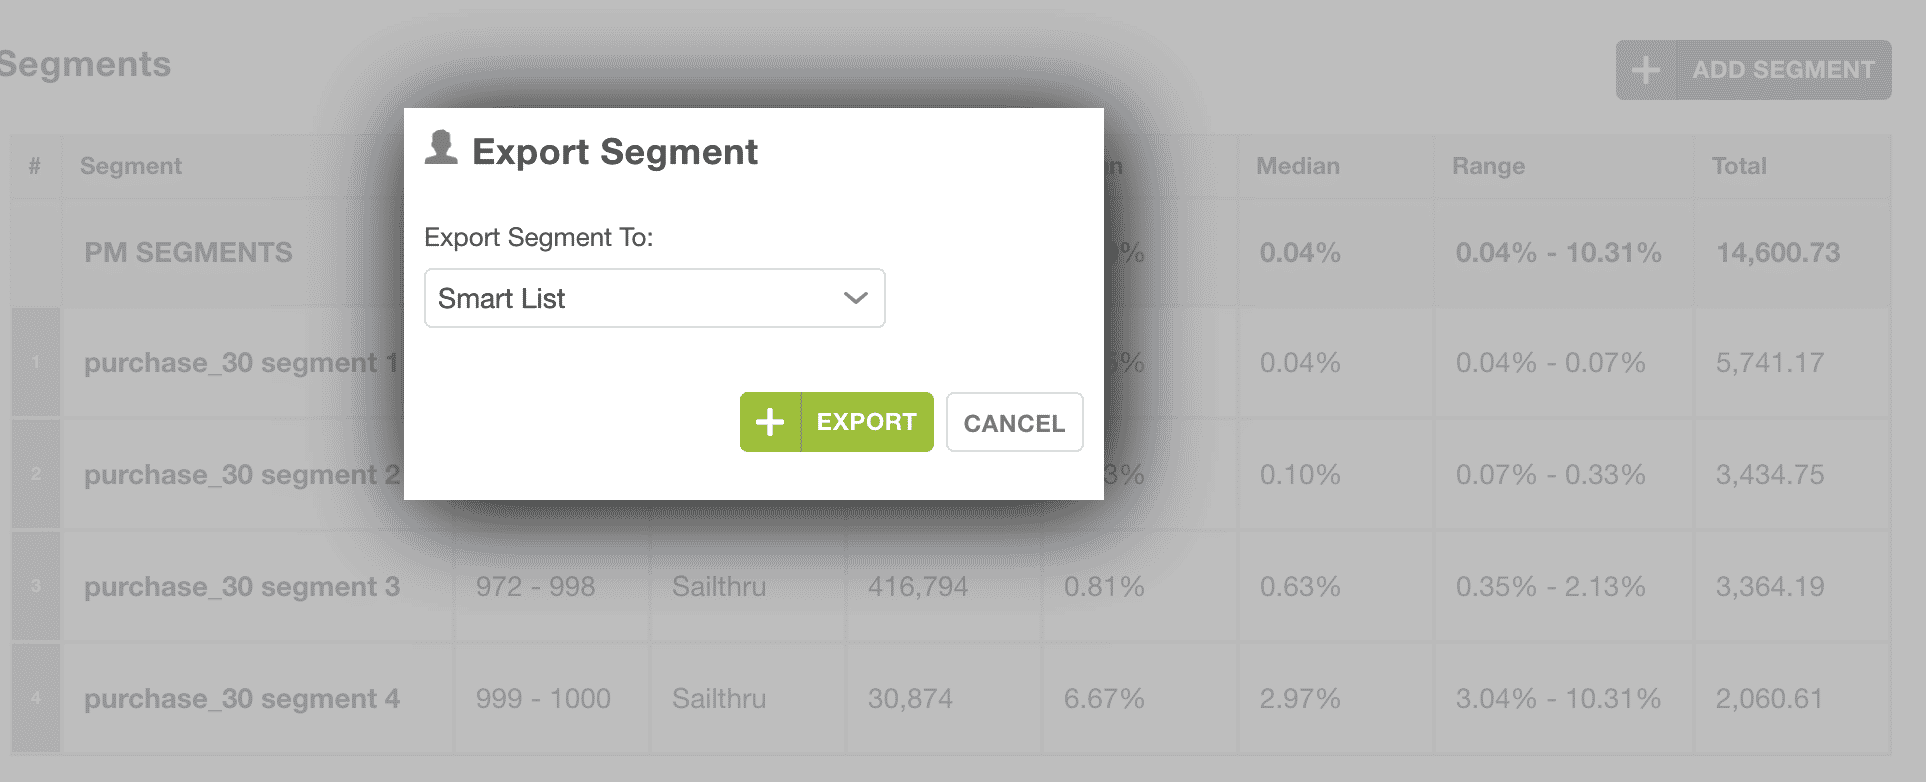
When you click Export, Audience Builder will load with the Predictions criteria you have selected. (At least for your initial export to Facebook, we recommend keeping these criteria as-is without any additional user filtering, so that you can properly gauge the effectiveness of this Predictions-powered segment as compared with any other variables.)
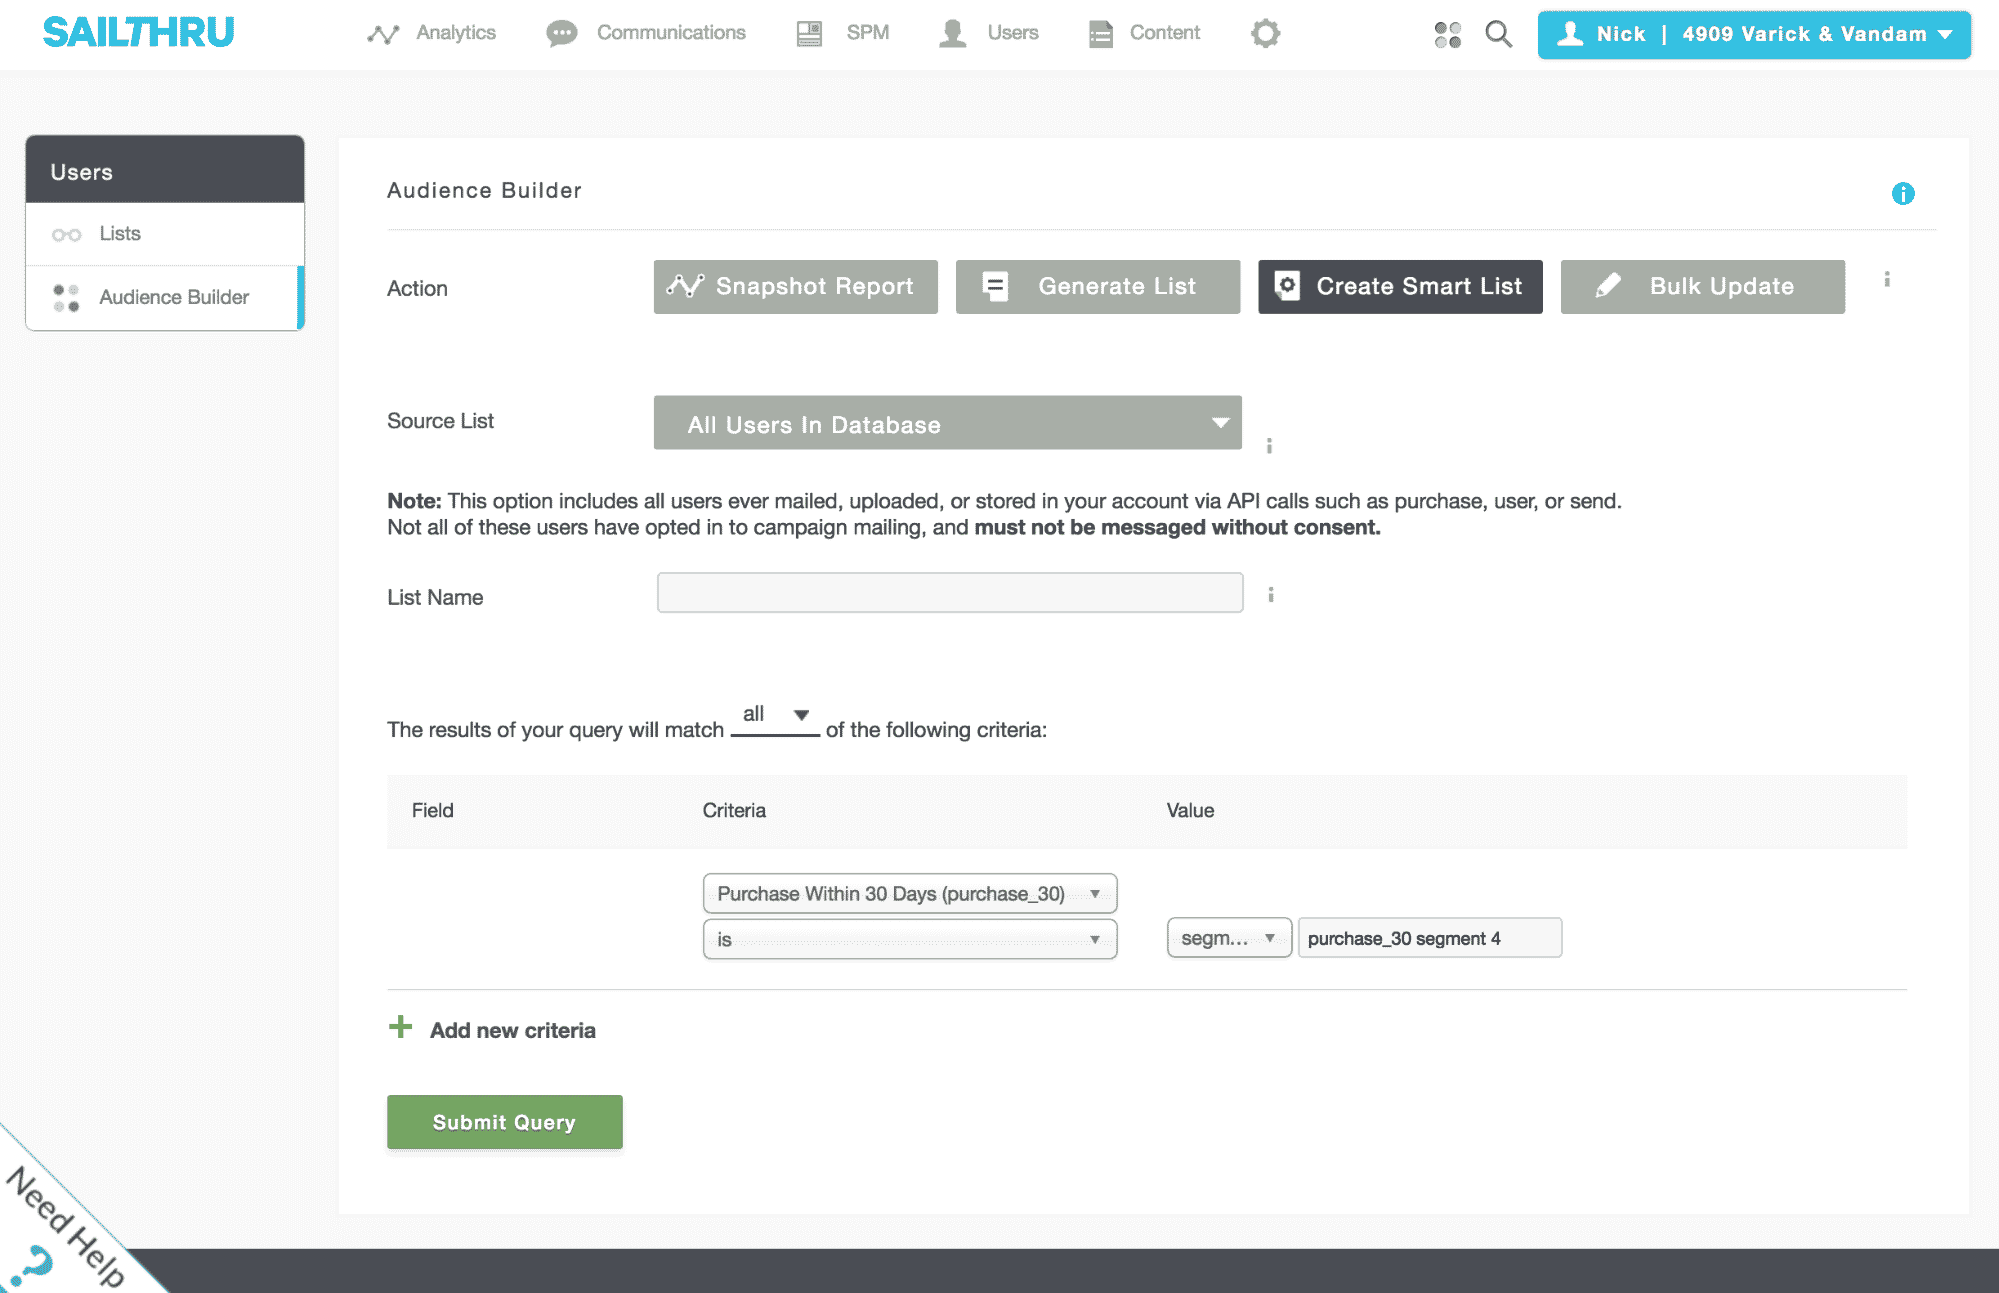
Click Submit Query to complete the generation of the Smart List.
2. Send the Smart List to Facebook
Once you’ve saved the smart list, go to the Lists page at my.sailthru.com and export it to Facebook by clicking the cloud icon and choosing Facebook Custom Audiences.

Note: Going forward, you can keep your Facebook Custom Audience up to date by returning to the Lists page at any time and clicking the cloud icon again to push the latest users who match the smart list criteria.
On the next screen, choose Create new audience.
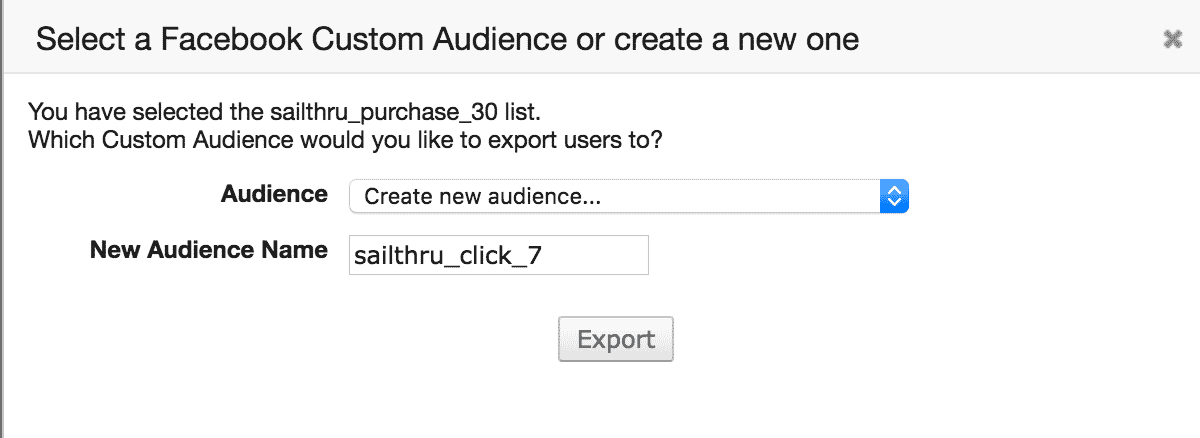
When naming the audience (as it will be displayed in Facebook), choose a name that will allow you to identify it as being sourced from the segment you used. For example “sailthru_click_7” or “sailthru_purchase_30”. This will allow you to quickly see which audiences have come from Engage by Sailthru and create lookalikes.
Click Export, and Engage by Sailthru runs a job to process the list and push all users to Facebook. Depending on the size of your list this may take a few minutes.
3. Create your Lookalike Audience
When the export job is complete, go to the Audiences page in Facebook’s Business Manager to view your new Custom Audience.
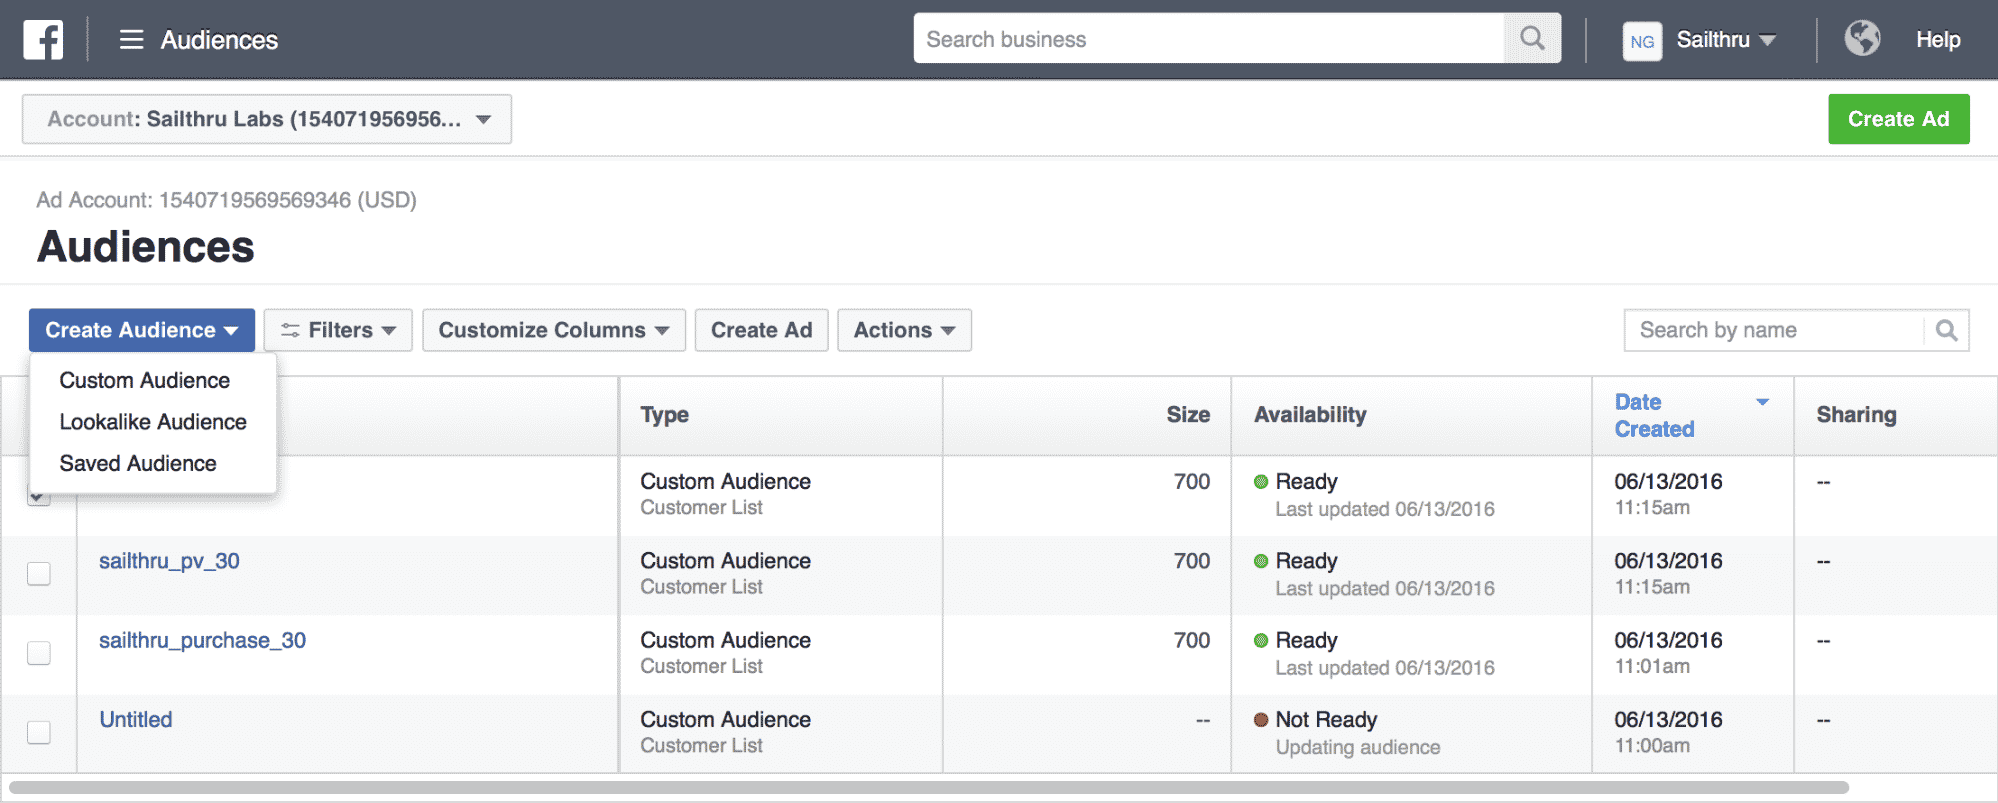
You will see the audience that you exported. Select the checkbox next to the correct audience. Click the Create Audience menu and select Lookalike Audience.
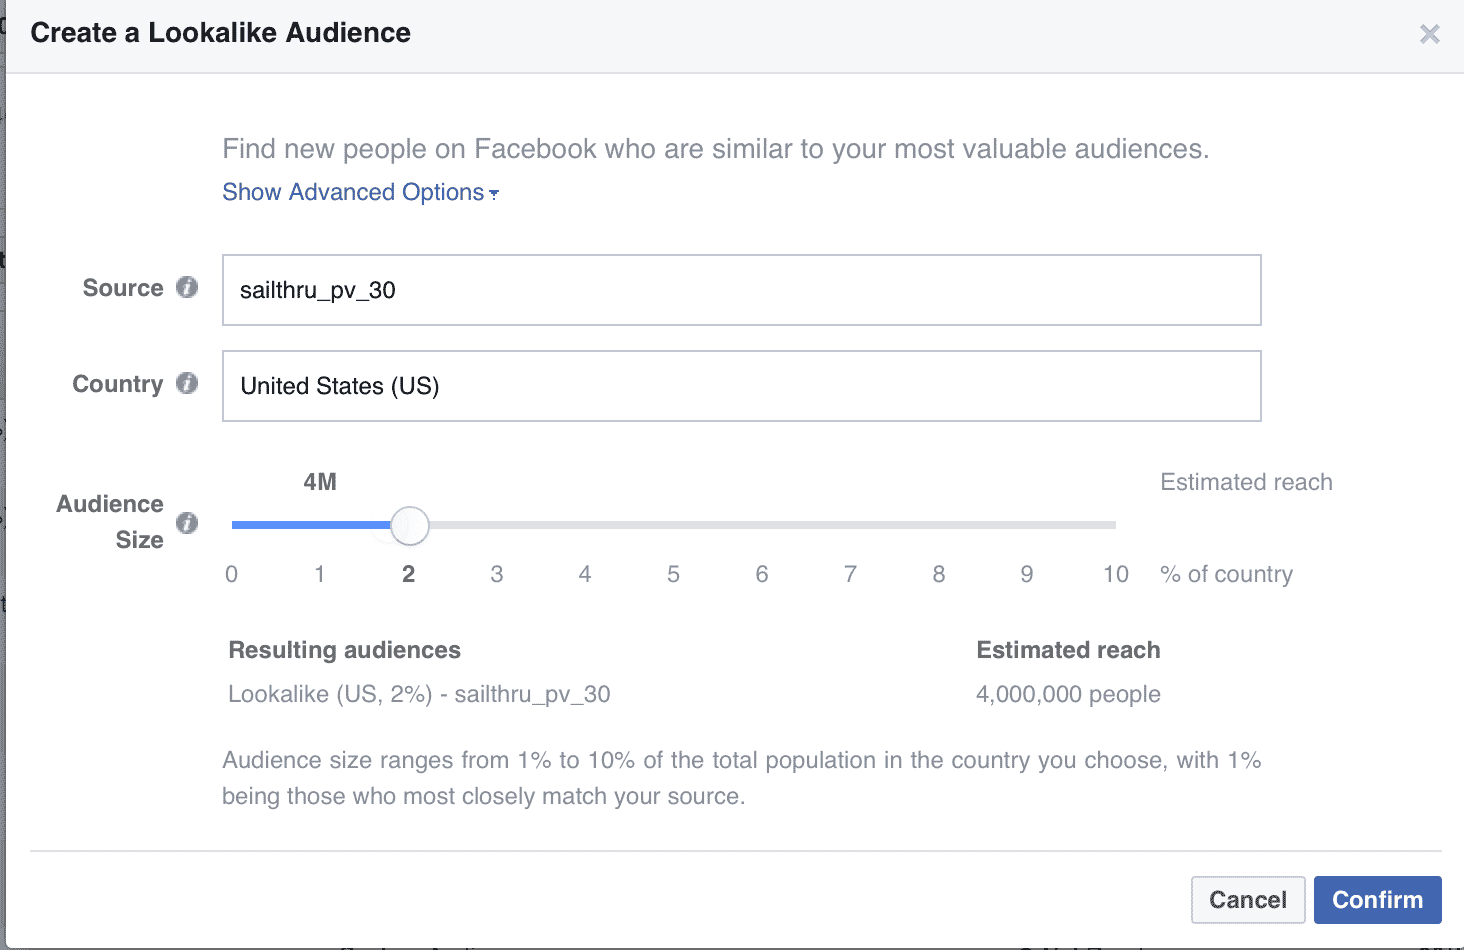
Use the slider to select the size of the audience. There is also an advanced option where you can quickly create a number of audiences at the same time.
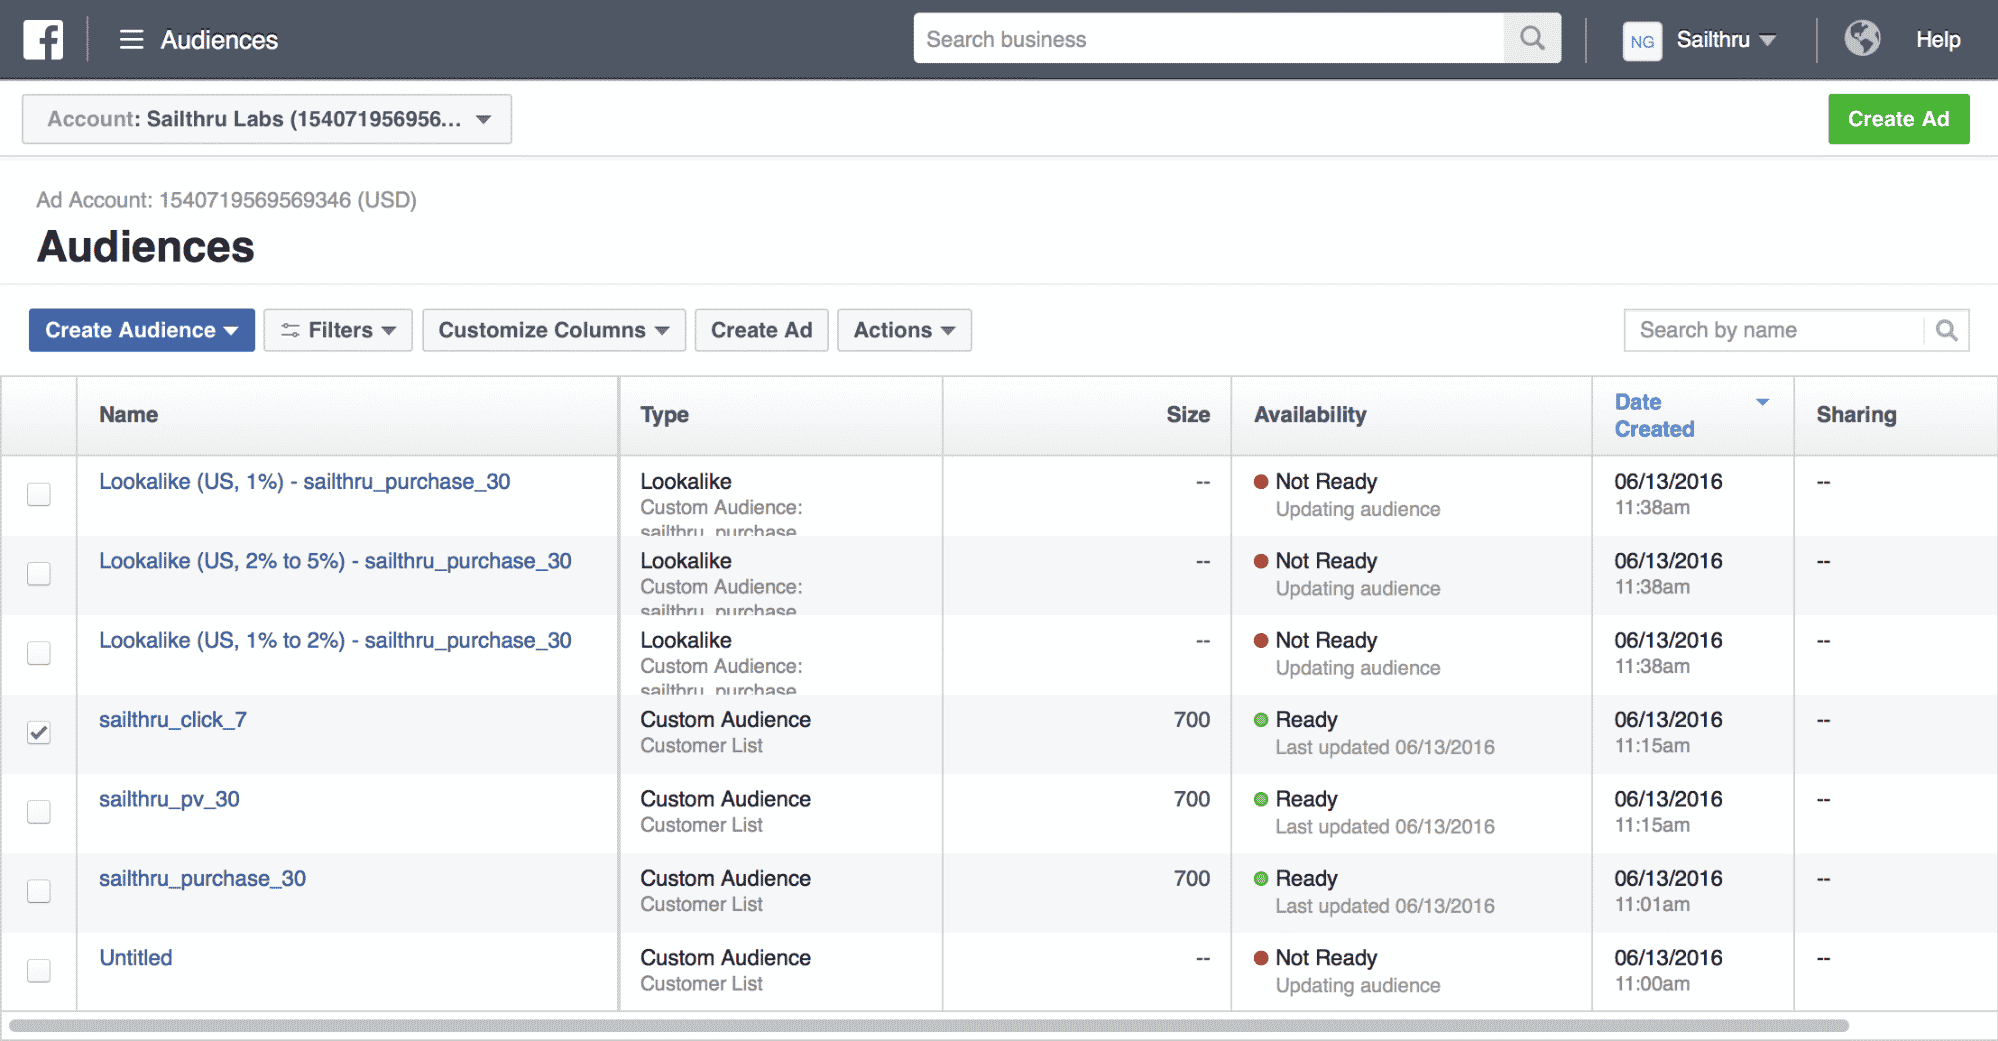
From the newly created lookalike audiences create a new Ad by clicking on ‘Create Ad” in the top right hand side with the new lookalike audience checked.
4. Create the Ads in Facebook
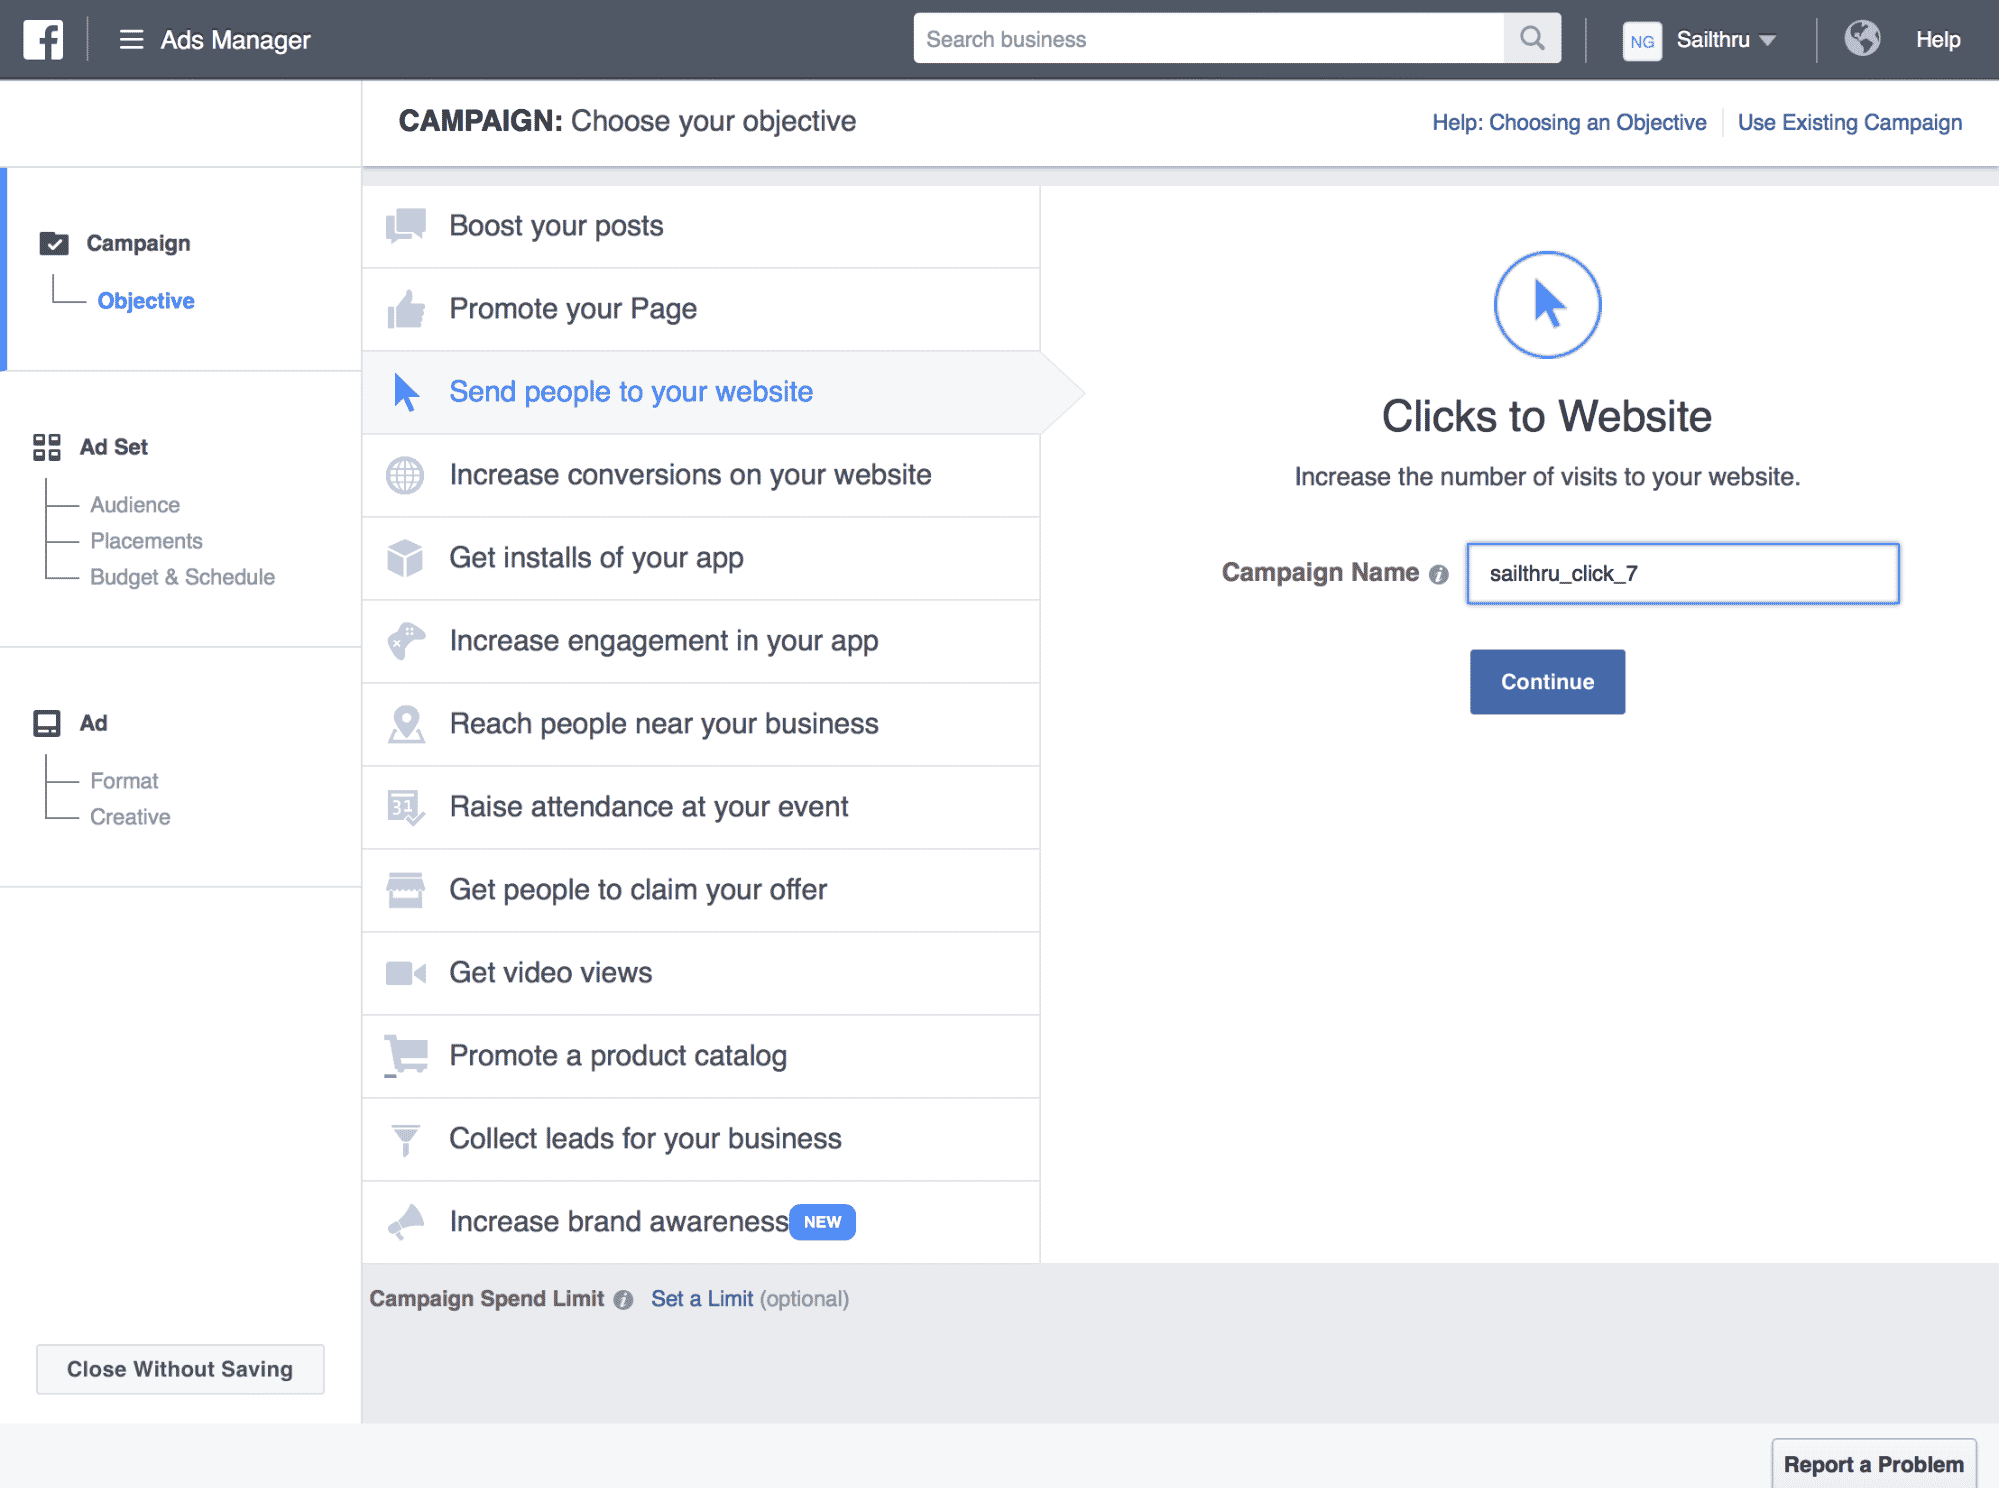
As we’re targeting the acquisition of new users, when creating an ad you’ll want to select an Ad Type of either “Send People to Your Website” or “Increase Conversions on Your Website”. Both provide similar options. (Optional: Choose “Collect leads for your business” to create a Lead Ad, and leverage the Facebook Lead Ads integration to send lead data back in real time.)
Create an ad with a campaign that matches the original segment that you exported. This will allow you to track success of the exported audiences in your own reporting. For example the, ad below uses a campaign name of sailthru_click_7. The goal of this campaign would be to find lookalikes of customers that are predicted to click in an email campaign in the next 7 days. If you are using other audiences, identify them in the same manner.
To target the Ads you will choose the Lookalike audience from the “Custom Audiences” section of the Ad Setup.
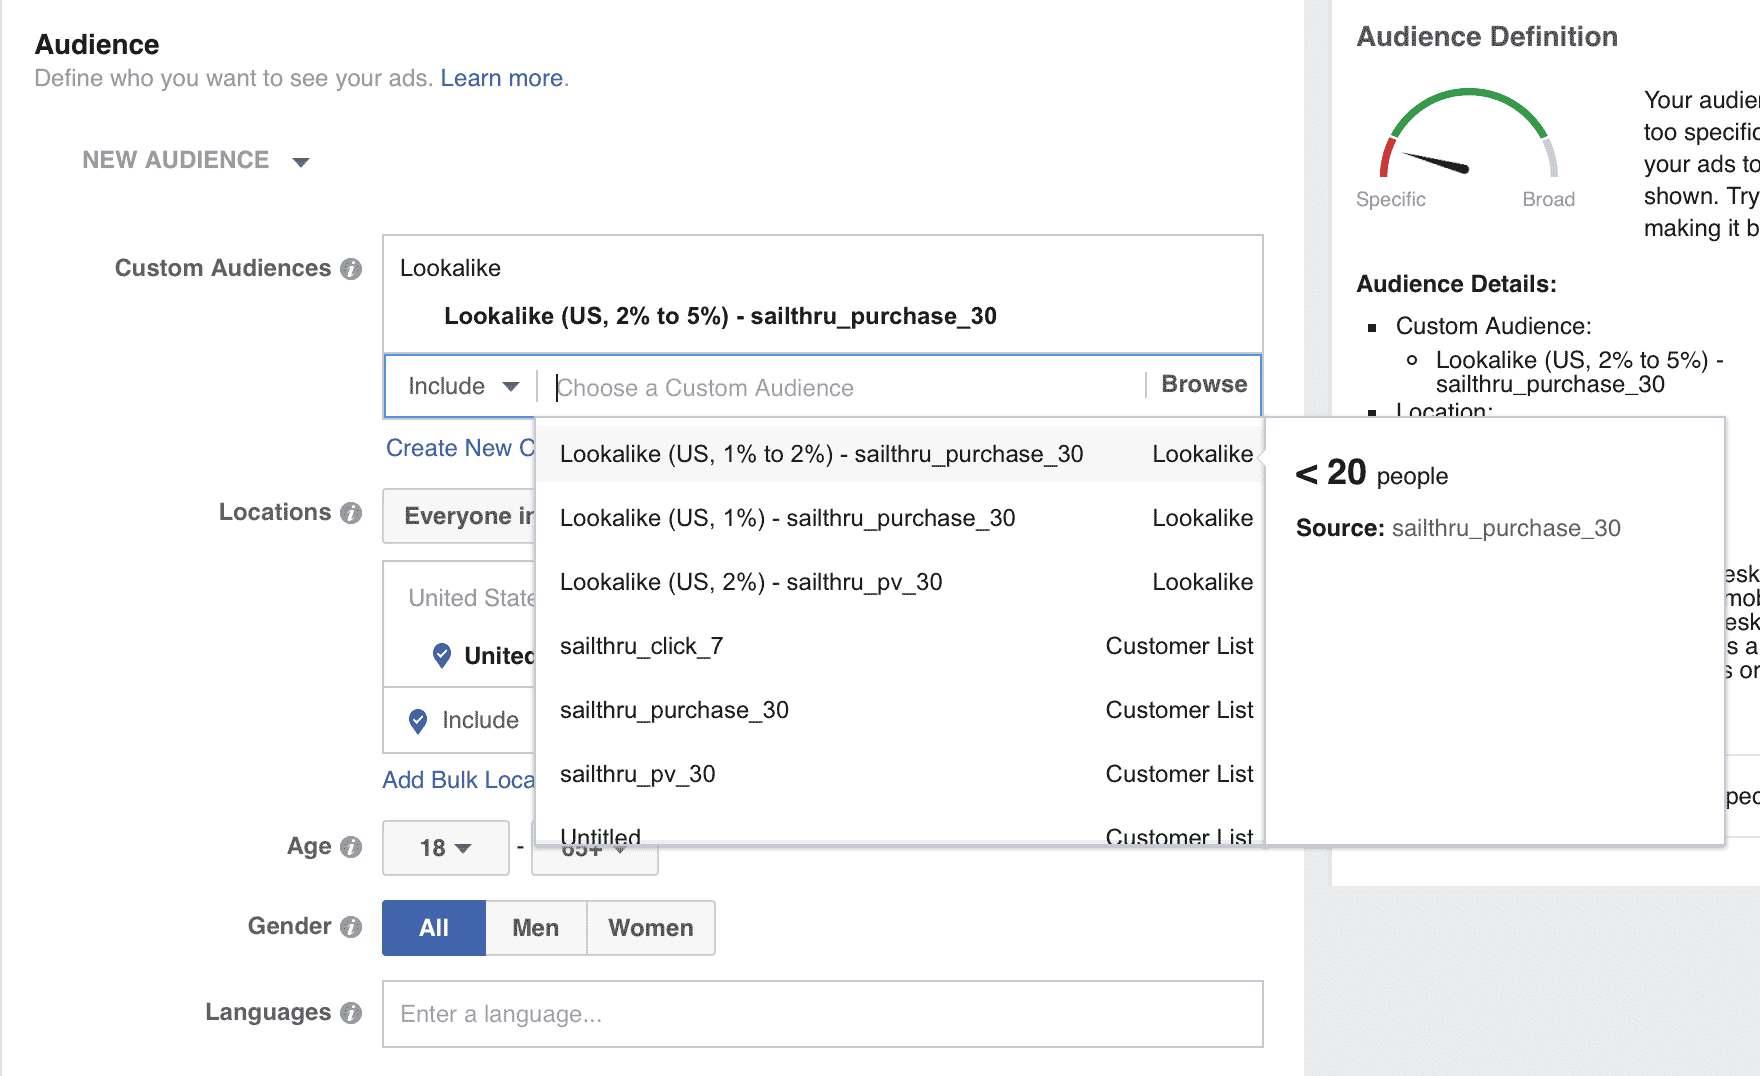
If you want to suppress against another list exported you can also choose an Exclude list.
5. Enable Conversion Tracking
Once you’ve started to create the ad, the only critical piece left will be to ensure that you are correctly attributing ad activity to the ad campaign.
We recommend that you pass a parameter to the Website URL that matches the audience that you use when you make a User API call. For example in the image below the audience is from the a list exported to target lookalikes of users predicted to have a the highest likelihood of pageview in the next 30 days.
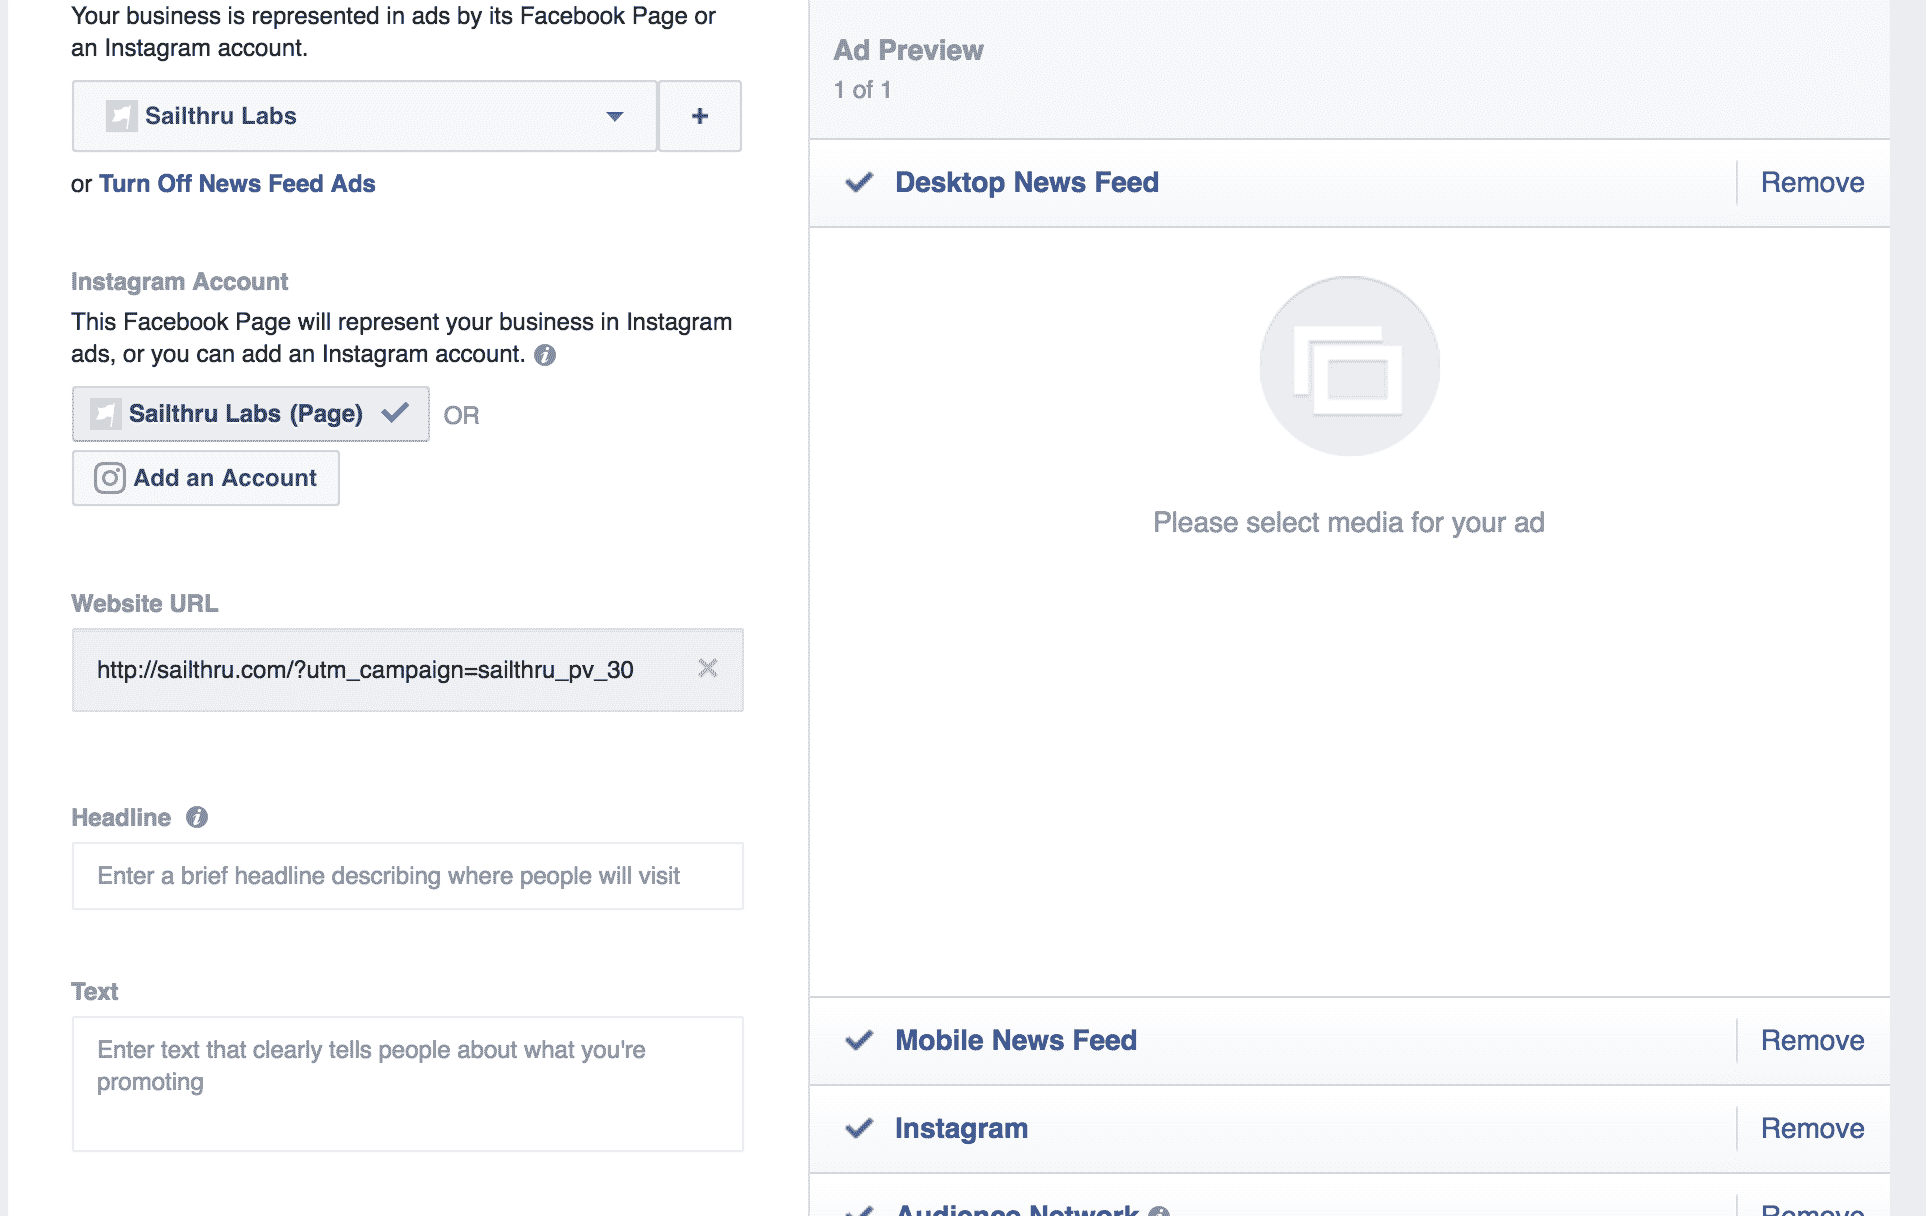
To uniquely track each Facebook Campaign, the system can use the utm codes to create a unique variable associated with a campaign. This variable should be unique for each campaign, and set for each user passed to Sailthru.
In the example above, a Facebook Campaign targeting a lookalike audience of users likely to generate pageviews in the next 30 days. You should pass vars to record that this user converted from this campaign.
Using the User API you would send additional vars when the user completes any interaction with your site, such as a login, subscription to a newsletter, purchase, etc. This also allows you to assess the long-term behaviors of the customers acquired through these channels.
Example for Publishers
By setting the var names and associated values below, you can record that this acquisition is coming from Facebook; specifically, from a Facebook campaign called pv_30 which is aimed at lookalikes of users that are predicted to generate pageviews in the next 30 days.
- source : facebook
- source_fb_pv_30 : true
- fb_custom_audience_pv_30_date : (Unix timestamp of date of user signup)
Example for Commerce
For ecommerce companies running a campaign for lookalikes of those users likely to make a purchase in the next 30 days the attribution should indicate the audience is from a list of users likely to purchase.
- source : facebook
- source_fb_purchase_30 : true
- fb_custom_audience_purchase_30_date : (unix timestamp of date of user signup)
In each example, the var name passed includes the name of the matching campaign.
Optional: A user converting from Facebook may already be in the system. To make sure you don’t overwrite your original source attribute make a GET request to the User API passing the user’s email address as the ID parameter. If the user exists, do not pass source as a parameter to the user API call. In that case, our example would be to only submit vars for the campaign and campaign signup date.
- source_fb_purchase_30 : true
- fb_custom_audience_purchase_30_date : (unix timestamp of date of user signup)
By tracking the attribution of the user acquisition from the original export of the user from a predicted segment you’ll be able to discover how successful Predictions is for your bottom line, and what user behaviors are typical among the users you acquire through this method.
We’re confident that the combination of Predictions with our Facebook Custom Audiences integration will allow you to identify and employ the types of predictions that are most valuable to your business, generating significant lift.