Forward To A Friend
Contents
Deprecation Notice
In keeping with Gmail and Yahoo's new sender requirements, we'll be deprecating the Forward to a Friend functionality at the end of March 2024. This is to ensure that forwards aren't marked as spam within the new requirements.
While the Forward to a Friend functionality will no longer be available, your subscribers will still be able to forward content using the forward button within their email.
Expand your readership by enabling subscribers to share content with friends.
Include a forward-to-a-friend link inside your campaign, and the system provides an automatic form when that link is clicked. Use the sample provided in your campaign and create a template named "forward" to host the content. (New accounts are automatically populated with a "forward" template that you can modify according to your needs.)
Note: Forward to a Friend does not work in test sends or transactional sends. It only works in live campaign sends. To test this feature, create a live campaign with a list limited to those testing the message.
This feature will use your account to send the "public" version of a message to another email address. In order to send the requested message, a new profile will be created in your account, allowing the user to be accessible in Audience Builder "All Customers in Database" query even if they do not subscribe to a list. Remember that such users may not be opted-in to your marketing messages, or established other preferences if/when they previously signed up for your messaging.
Public versions remove Zephyr profile placeholders you may be using, such as name, location or other custom field values. Read more on the public URL page here.
The Forward to a Friend feature does not subscribe the recipient of any forward to your marketing lists. It is meant to provide the original recipient of your message the opportunity to pass that message to one or more of their own personal contacts.
Basic Setup
- In your campaign, include the forward_url standard variable. The HTML might look something like this:
<p>To forward this newsletter to a friend, <a href="{forward_url}">click here</a>.</p>
- Create a template named "forward". In the code, include {forward_html}. This will automatically pull the content of the original campaign into the forward. Your HTML might look something like this:
<body>
{forward_html}
</body>
{from_name}or {from_email}variable. These are pulled from the auto-form the sender fills out.
Advanced Setup
- In the "forward" template, you'll need to include a Subject line. You can use the
{from_name}variable here as well. For example:{if from_name} {from_name} {else} A friend{/if} recommended this newsletter!
- In the "forward" template, you'll need to include a From Address.You cannot use an email address to send that is not verified with Sailthru. We suggest creating a new email address such as "forwardtofriend@domain.com" and using that as the from address for this template.
- If you want to exclude a section (e.g. unsubscribe section) from a forward, you can use the following code in the original campaign (not the "forward" template):
{if !is_public}<p>If you believe this has been sent to you in error, please safely <a href="{optout_confirm_url}">unsubscribe</a>.</p>{/if}Similarly if you wanted to put something in the public version only (e.g. a signup offer at the top) in the original campaign, you could use:{if is_public}<p>Like what you see? <a href="http://example.com/signup">Click here to signup!</a>.</p>{/if}
Style the Auto Form (Optional)
The platform automatically provides a form when the subscriber clicks the link within a campaign to forward to a friend. The user provides their own email and their friend's email address. The auto form can be styled using custom CSS. Otherwise it will use the default settings shown below. Custom styling can be accessed in the Account tab > Custom Link CSS. Modify in the "Edit CSS" tab. Click the "Preview" tab to confirm the result, and then click "Save."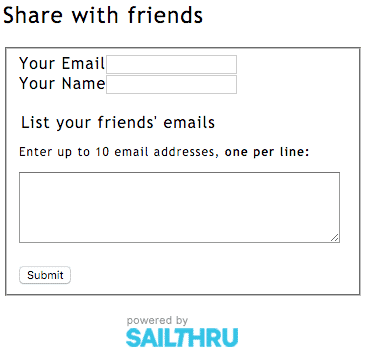
Append Vars with Forward
Append a custom user variable to both the user forwarding a message to a friend and the friend receiving a forwarded message. If the person receiving the forwarded message signs up from the message, you can use the variable for targeting messages.- Open your Forward to a Friend template.
- Select the Triggers tab. On the Triggers page, select New Trigger.
- In the Create Trigger modal, set the following:
- Set On Event to send.
- Set the time and time unit you wish to use.
- Set Action to Custom Zephyr Script.
- Add a similar Zephyr statement to the text box to set a custom variable for the recipient. You can use any variable name:
{api_user({"vars": {"ftaf_recipient": true}})} - Save the trigger.
- Select New Trigger again to append a custom variable for the sender. Use the same settings as in step 3.
- Add a similar Zephyr statement to the text box to set a custom variable for the sender. You can use any variable name:
{api_user({"vars": {"ftaf_sender": true}}, message.vars.from_email)} - Save the trigger.
- Switch to the Advanced tab.
- Add the following in the Setup box:
{message_vars({'from_email':from_email})} - Save the template.