Push and In-App Campaigns
Contents
Deliver curated messaging to your app users with Push and In-App campaigns.
Getting Started
Create a Push and In-App Template and an Audience before you build a Push and In-App campaign.
- For information on building a template, see Push and In-App Templates.
- For information on reporting, see Push and In-App Summary.
- When viewing a report, especially in a third-party application, all Push Notifications will show as transactional. This is due to the delivery mechanism and should not affect any metrics.
Create a Push and In-App Campaign
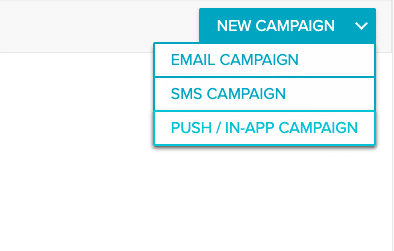
Creating a Push and In-App campaign is very similar to getting started with an email campaign. Select Campaigns from the Messaging menu in the platform. This takes you to the Campaign List page.
- From the New Campaign dropdown menu, select Push/In-App Campaign.
- A new Push/In-App campaign screen opens. Rename your campaign first. Select the Edit icon next to New Push/In-App Campaign.
- An editable text box opens. Enter your campaign name and select the checkmark.

- Select an existing template in the Template section. You'll also see the information contained in your messages to the right.
- Select the Mobile app to which the campaign should be sent. If you have only one Mobile app it will be selected by default.
- Select an Audience. The preview will show how many users you'll message.
Note: The Audience user count is figured differently from the device count on the Mobile platform. You will see a difference in the number of users available to message. - Schedule your message. You can send immediately, select a day and time to send your message in the recipient's local time, or schedule a specific day and time in your account's local time.
- Select Send now to send immediately or select Schedule Campaign to schedule your message.
Push and In-App Campaign Builder
The Push and In-App Campaign Builder is a single screen workflow. The Template and Audience sections include a preview window, so you can see your message information before you send and how many people you'll message.
Template
Select a template from the template dropdown menu or type to search for a specific template.

When you select a template, you'll see a preview of the messages in the Preview section.
![]()
If you wish to further edit your template, select the link at the end of the preview.
Mobile App
Select the Mobile app to which you wish to send your messages from the Mobile App dropdown menu. You can also type to search for a specific app. If you only have one Mobile app it will be selected by default.

Audience
Create an audience for your Push and In-App messaging in Audience Builder. You don't need a specific filter to create a list for push/in-app users. Those are counted automatically as you filter your list and are shown in the Audience Preview.
- From the Audience Builder page, select your base list (see Audience Source in the Audience Builder documentation).
- Filter your list to create an audience specific to your send.
- Select Done, then Save as Smart List. Give your name a unique list and save it. Note down the list name.
- Use this list while building your Push/In-App campaign. Select it from the drop down menu under Audience on the Push/In-App campaign builder page.
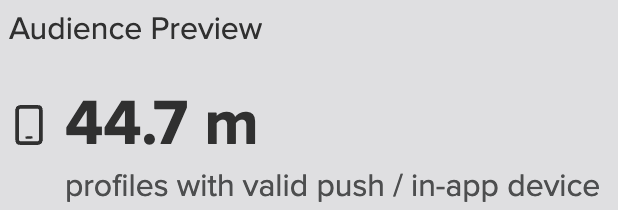
Audience Preview
When you select an audience, an Audience Preview loads on the right side of the screen. This shows how many profiles in your audience have a valid device with your app installed on it.
Schedule
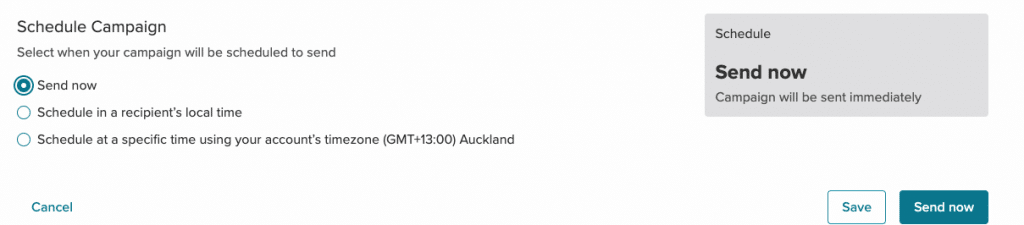
There are three ways to schedule your Push/In-App message.
Send Now
Send your message as soon as you confirm it.
Select Send Now to open the Schedule campaign modal window.
Check that the information in the Schedule campaign modal is correct and select the checkbox to acknowledge that all recipients have given explicit consent. Once you select the checkbox, the Send Now button turns blue. Select the button to send your message. 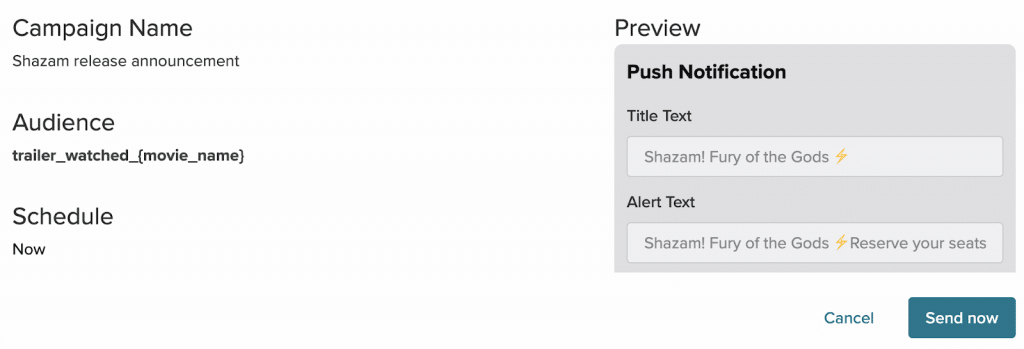
Recipient's Local Time
Send a message at a specific day and time for all recipients. Using these options means that everyone in your audience will receive the message at, for example, 8:30 AM in their own time zone.

Use the date and time pickers to select the date and time.
Select Schedule Campaign to open the Schedule campaign modal window.
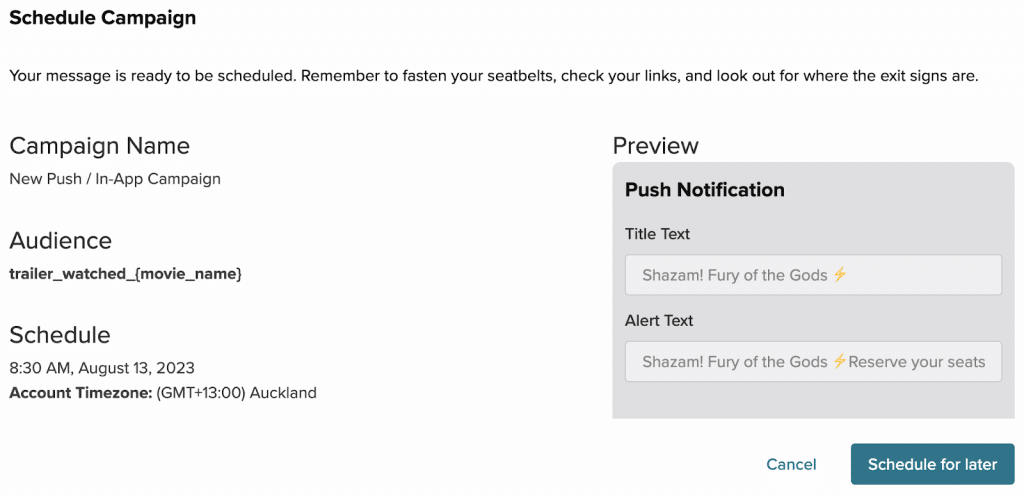
Check that the information in the Schedule campaign modal is correct and select the checkbox to acknowledge that all recipients have given explicit consent. Once you select the checkbox, the Schedule For Later button turns blue. Select the button to schedule your message.
Specific Time
Select Specific Time if you want a message to be sent on a specific day and at a specific time based on the time zone for your Sailthru account. You will always see what your account's local time zone is when you select this option. 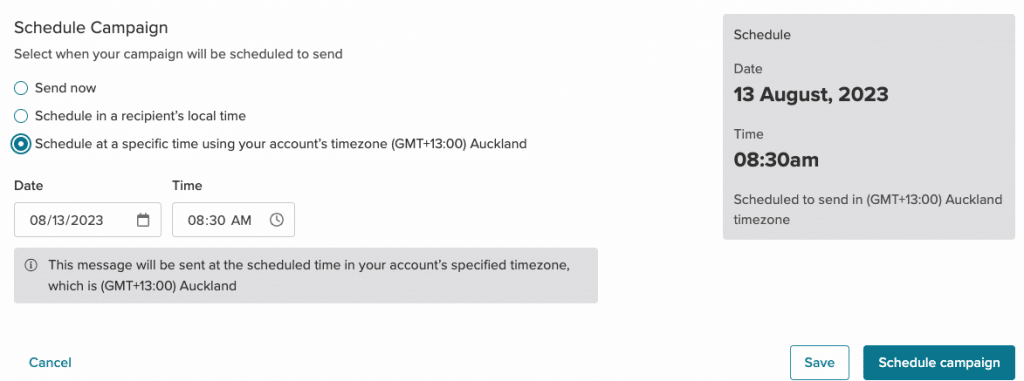
Select Schedule Campaign to open the Schedule campaign modal window.
Check that the information in the Schedule campaign modal is correct and select the checkbox to acknowledge that all recipients have given explicit consent. Once you select the checkbox, the Schedule For Later button turns blue. Select the button to schedule your message.
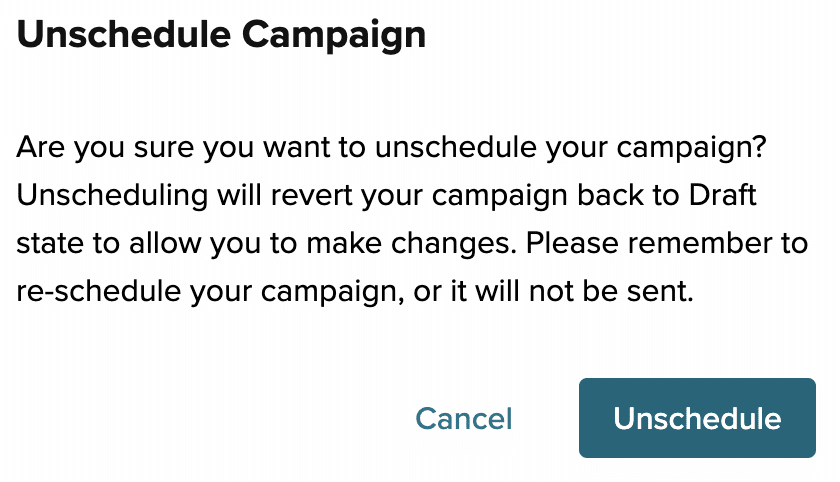
Unschedule campaign
If you need to make changes to a scheduled campaign that hasn't started sending yet, you can unschedule the campaign.
- Select the Scheduled tab on the Campaign List Page.
- Select the campaign you wish to unschedule.
- Scroll to the bottom of the campaign page and select the Unschedule button to open the Unschedule Modal.
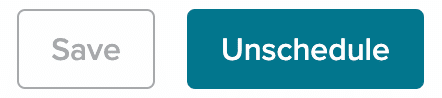
- Select Unschedule from the Unschedule Modal to return your campaign to draft status. You will need to reschedule your campaign once you've made the necessary changes.