Configure a Section
Contents
A section is a personalized area of your site that may exist across any number of pages.
For each section, you will specify:
- A feed (optional) - Depending on the personalization algorithm you will choose. Some algorithms can retrieve content directly from your Content Library, with no feed required.
- A rule created using the Rule Builder or written directly in the Zephyr language to select and prepare content from your Content Library or from a feed, for example, to filter by tag and to request user-specific content recommendations.
- A template or JSON object name.
- If you choose to receive a JSON object of feed items, you can present the content using your own JavaScript code.
- If you want the system to render the HTML for the section, specify template code (using Zephyr, HTML, CSS, and/or JavaScript) along with the logic for which pages and HTML element should display the section.
- One or more optional section audiences, to vary the feed, rules, and/or template based on whether the viewer is part of a particular user list. Each audience is assigned a unique list, chosen from the lists in your account. If no audience is matched, default section parameters are used.
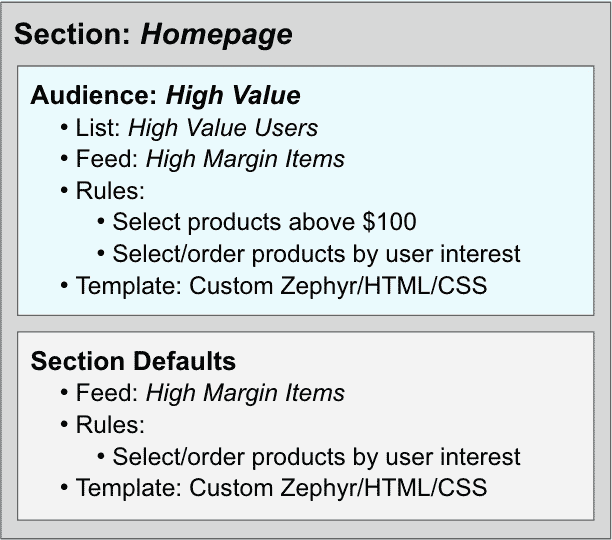
Below is an example section configuration, with one optional audience. If the user does not match that audience list, section defaults are used for the display.
Create a New Section
- On the Recommendations page, below the graph, click
 .
. - Enter a Section Name. This name is for your internal reference and will not be visible to your users.
- If you have implemented the Personalize JavaScript using the default Single-Line Mode, use the Setup section to specify the page(s) and CSS selectors that should display the section. (If you enable Instrumented Mode, you can still use these fields to configure the section, but you also have the alternative option of explicitly specifying the section that should appear within the JavaScript of any given page. For more information on the difference, see the SPM Implementation page.)
- In the Page field, enter a regular expression to match the URL of the page(s) where the section should be displayed. For example:
example.com/mens/page.htmlFull-URL string - matching sections will only be displayed on http://example.com/mens/page.html/example\.com\/mens\/.*/Regex string - matches any URL that contains example.com/mens//.*/Regex string - matches every URL on the Site Domain; useful, for a header/footer section present on every page)
- In the Page Element field, enter the CSS selector that will identify the HTML element to display the section. For example, the class .html-personalized or ID #sailthru-recs.
- In the Page field, enter a regular expression to match the URL of the page(s) where the section should be displayed. For example:
- From the Content Feed drop-down, select a feed.
- Under Rules, select an existing rule. The rule code is run for each user prior to rendering the template. It handles the conversion of raw content data (from your Content Library or feed) into a set that is customized for the section and/or the individual user. If you are using a Zephyr (custom) rule, be sure to use recommendations as the name of the content array variable that you wish to send to the template.
- Under Onsite Template, you can choose whether to return content from your Rules code as a JSON object or specify template code to be rendered and inserted into the page.
- To specify JSON, click JSON Recommendations and enter a the variable name from your rules that you want returned as a JSON object that will be made available to the JavaScript on your site (as onSuccess.data). Then click Save.
- To specify a template, click Select Onsite Template. Then, either click a template name under Existing Templates or click Create New Onsite Template, enter the template code, and click Save. Note: Your template code should reference the content array from your Zephyr rules that you wish to display.
- In the Preview area, preview the section's rendered HTML or JSON as it will appear to a specific user (by entering an email address) or an anonymous user.
- Click
 .
. - The section details are saved and JavaScript code to enable the section is displayed. Copy this code and ensure that it is added to the pages of your site that will display the section.
Create a New Audience for a Section
You can create one or more audiences for your section to further customize the display when your user matches a certain known-user list, or skip this step and use the same feed, rules, and template for all users.
- On the SPM home page, under Sections, click the section name.
- On the section's page, under Audiences, click
 .
. - From the List drop-down, select the list of your users that will view this audience if and when they load the section.
- From the Content Feed drop-down, select the feed to use for this audience.
- Under Rules, select an existing rule or click Custom Zephyr to write new rule code. This code is run for each user prior to rendering the template. Its resulting variables, including the content that will be displayed, are made available to the template code.
- If you select an existing rule, you can click the edit icon
 to modify its code.
 - Under Onsite Template, you can choose whether to return content recommendations as a JSON object or specify template code to be rendered and inserted into the page.
- To specify JSON, click JSON Recommendations and enter a variable name that will be assigned to the JSON object and made available to the JavaScript on your site. Then click Save.
- To specify a template, click Select Onsite Template. Then, either click a template name under Existing Templates or click Create New Onsite Template, enter the template code, and click Save.
- In the Preview area, preview the section or JSON as it will appear to a specific user (by entering an email address) or an anonymous user.
- Click
 .
The audience details are saved and you are returned to the section's management page, where the new audience is listed by the name of its list.
.
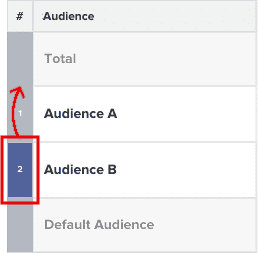
The audience details are saved and you are returned to the section's management page, where the new audience is listed by the name of its list. - If there are multiple audiences, you can change their order of precedence. (If the user does not match the list in the first audience, the second is checked, and so on.) Audiences' order of precedence is indicated by the numbers in the leftmost column. To change the position of an audience, click and hold its position number and drag it to another position.
Edit or Delete a Section/Audience
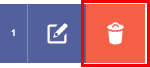
- To edit a section or audience, click the number to the left of its name and select the edit icon.

- To delete a section or audience, click the number to the left of its name and select the delete icon.
Example Configuration
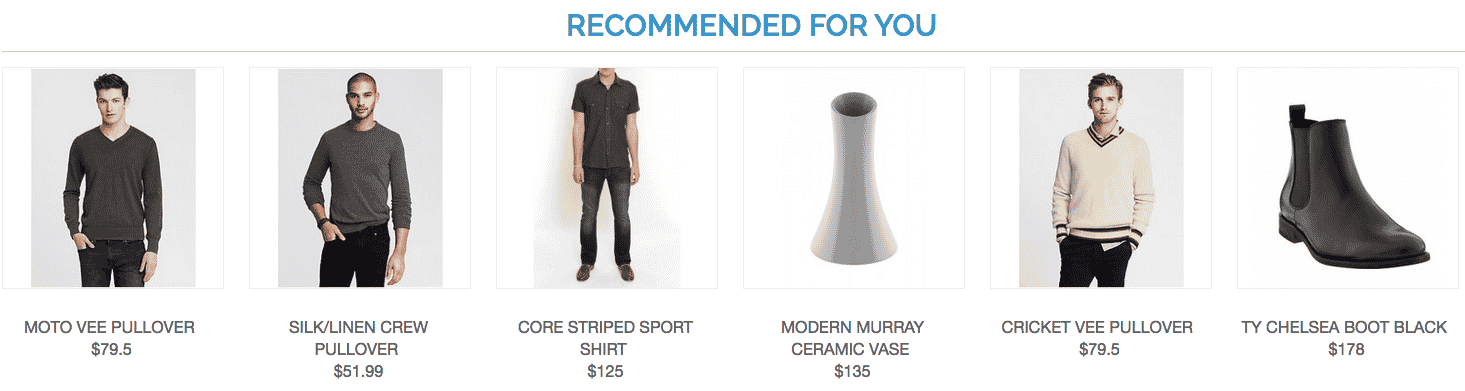
To produce a horizontal display of 6 recommended items based on user interest, you could create a section using:
- A Horizon content feed
- A rule, written in Zephyr, to select six recommended items:
{recommendations = personalize({ "algorithm" : "interest", "size" : 6, "content" : content, "include_tags_any" : [ "shirts", "boots", "pullovers", "vases"] })} - A template, written in Zephyr and HTML, to display the items:
{foreach recommendations as c}
<li>
<a href="{c.url}" title="{c.title}" class="product-image">
<img src="{c.image}" width="176" alt="{c.title}"></a>
<br>
<h3 class="product-name">
<a href="{c.url} " title="{c.title}">{c.title}>
</a>
</h3>