Campaign Engagement in Lifecycle Optimizer
Contents
Campaign Engagement entries behave differently from other Lifecycle Optimizer flow entries. Once you select a Campaign Engagement entry, you'll only be able to set a custom profile field.
This allows marketers to track open and click engagement specific to a campaign audience (list) or a collection of campaigns sent to a label (i.e, "Chicago.")Creating a Campaign Engagement Flow
There are two components that go into campaign engagement in Lifecycle Optimizer: your campaign and your Lifecycle Optimizer flow.Step One: Campaign
If you're creating a new campaign, have your list and template ready.- Create a new campaign OR locate the existing campaign you wish to use.
- Select an Audience for your campaign.
- If you're tracking campaign engagement by list, note the name of the list you're using.
- Complete the campaign creation steps to Configure, Design, Schedule, and Confirm your campaign.
- Save your campaign and return to the Campaigns List page.
- If you're using labels to track open and click engagement:
- Search for your campaign name or locate it in the list.
- Select the checkbox next to your campaign.
- Click the label button
 above the Campaigns List to select an existing label or create a new label.
 - Note the label or labels you're using if you will be tracking by labels.
Step Two: Lifecycle Optimizer Flow
- Navigate to Lifecycle Optimizer and create a new flow.
- Select your Entry: Email Clicked or Email Opened. For this example, we'll show the Email Clicked entry.
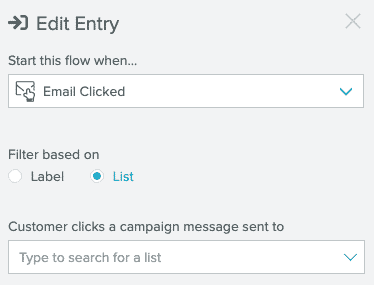
- Select List or Label as your filter type.
- If you select List, search for or select the list you used to create your campaign.
- If you select Label, search for or select the label or labels you applied to your campaign.
- Save your flow.
- Add an Action to your flow.
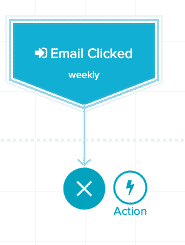
- There will only be one Action to select from the drop-down list: Set Custom Field.
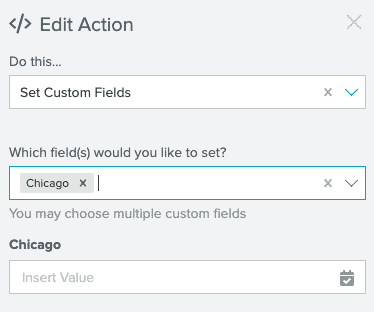
- Create or select one or multiple custom fields.
- Insert a date stamp as the value of your custom field by clicking the calendar icon in the value field.

- Save your changes and activate your flow.
Step Three: Tracking Engagement
Engagement tracking occurs in Audience Builder based on the custom field or fields you set. Depending on your selected filters in Audience Builder, you can build lists to locate user groups like:- Users who clicked in last 90 days
- Users who opened or clicked on a specific day
- Users who last opened X days ago.
- Users who have a custom field value applied
- Users who had a custom field value applied on a specific day
- Users who had a custom field value applied within a specific time frame
- If you're using "last_opened_x days ago" re-engagement entries, the system won't see the open if the user doesn't load images. Those users will not be included. If a user clicks but does not load images, they will also not be included.
- If a user has never clicked or opened (is dormant), they will not be included.
- To handle this limitation, you can build lists that target dormant users based on list subscription and custom field values. Building a list of dormant users only applies to Natural Lists that are used as the audience source.
Starting Audience Builder
- In Audience Builder, select a list as your audience source.
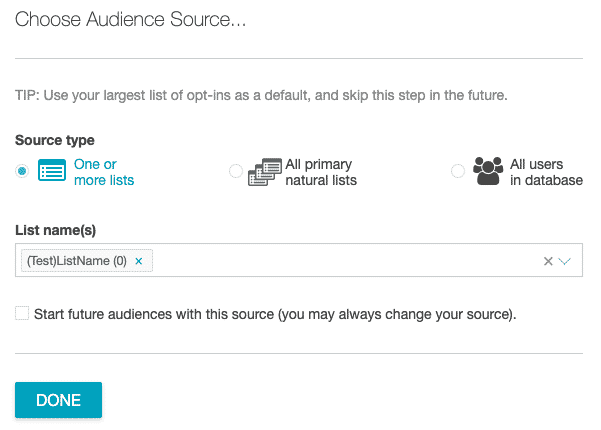
- If you're filtering engagement by List in Lifecycle Optimizer, select the list you used for your campaign.
- If you're filtering engagement by Label in Lifecycle Optimizer, select one or more lists OR all primary natural lists.
- Click Done to open Audience Builder.
Locate Users with a Custom Field Applied
- Select Date under Custom Profile Fields (vars) from the filter list.
- Enter your custom field name in the text field or select it from the drop-down menu.
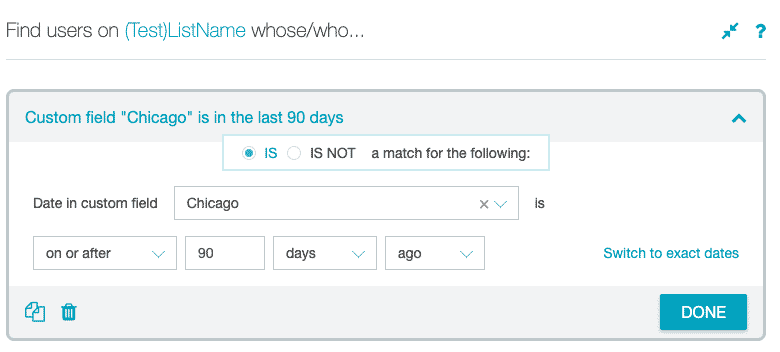
- Set the time period you'd like to filter for, or use an exact date to see how many users had the date stamp applied on a specific day.
- Click Done, then click Save as Smart List to generate a list of users.
Locate Users With a Custom Field Who Clicked
- Select Field: Exists, Contains, Is under Custom Profile Fields (vars) from the filter list.
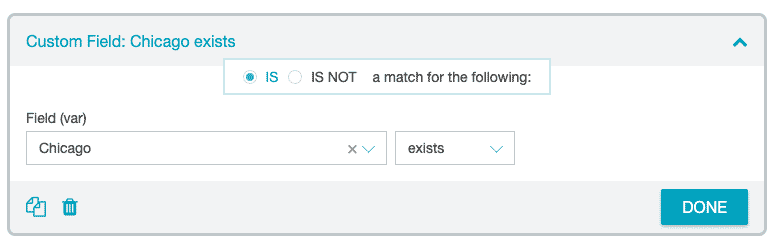
- Set your custom field name and select exists from the drop-down list.
- Select Email Clicks, Opens, Sends under Engagement in the filter list. This creates an AND statement between your filters. Users will only be added to the list if they meet both criteria.
- Select either Clicked or Last Clicked from the drop-down, set the click threshold, and set either a relative date or exact date.

- Click Done for each filter, then click Save as Smart List to generate a list of users.
FAQs
Can a single entry do clicks AND opens?You cannot combine opens and clicks at this time.
Do I have to use a list or label filter?
Yes, filtering is required. This allows you to filter to a specific vertical in your account, such as a "London" list or newsletters labeled "Weekly."
Will this work with recurring campaign sends?
Yes.
Where are the other actions and checks when I select this entry type?
This entry type currently supports only the Custom Field Set action, which includes the ability to set a date on the profile which can update with each click or open. All other actions and checks are not available in the first version of this entry. We do not yet have timelines for when they will be available.