Create Template Triggers
Contents
Template triggers are one way to create a Triggered message send. Triggers automatically execute events in response to certain actions at a given time. When a subscriber opens, clicks, or makes a purchase from the selected message, the trigger executes and a follow-up message sends.
Note: We recommend using a Lifecycle Optimizer flow instead of a template trigger as a best practice.
Triggers allow you to schedule events to automatically follow up with your audience based on certain actions: Receiving an email, opening an email, clicking through from your email, or purchasing from your site after clicking through.
For example, your users could automatically receive a follow-up email to provide their feedback a week after they are sent an Order Confirmation email. Again, keep in mind that these are only used with triggered messages and cannot be used with campaign messages.
Types of Triggers
There are five events that can determine whether a trigger is sent. These are based on the action of the user who received the email, with exception of send and cancel.
- An open trigger will send a message after a user opens an email. Note that you may want to include a send time based on when the user opens the email. For example, you may want to wait 24 hours if a user opens a special offer email, but doesn't claim the offer.
- A click trigger occurs when a user clicks on a link in an email. For example, you may want to send a follow-up message only to those users who have engaged with the content in a previous triggered message.
- A purchase trigger occurs when a user has purchased something promoted in a triggered message and a follow-up transactional message, such as a purchase confirmation, is sent to the user. For example, a purchase trigger occurs if user signs up and then purchases from clicking a coupon in the welcome email.
- Send executes the trigger at a certain time after the original template is sent
- Cancel is dependent upon the Zephyr function
cancel()evaluating to true -- orassert()evaluating to false -- within the email's code.
Create a Trigger
The trigger is set up on the parent template.
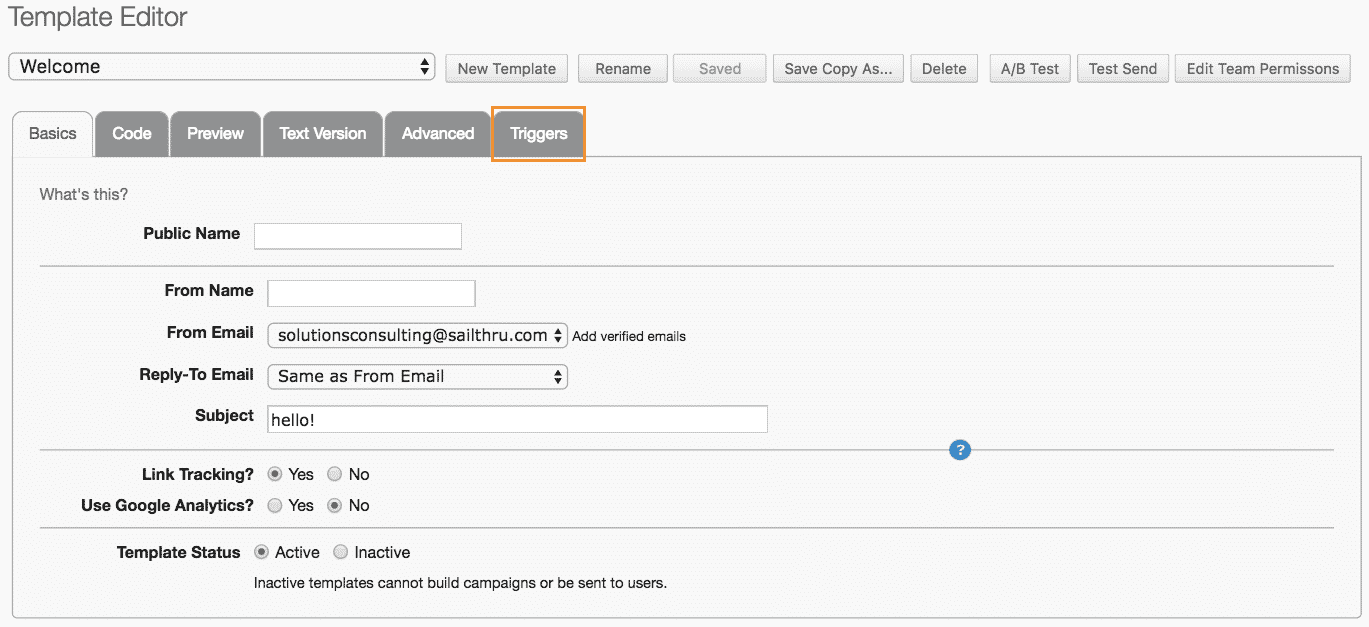
Trigger Options
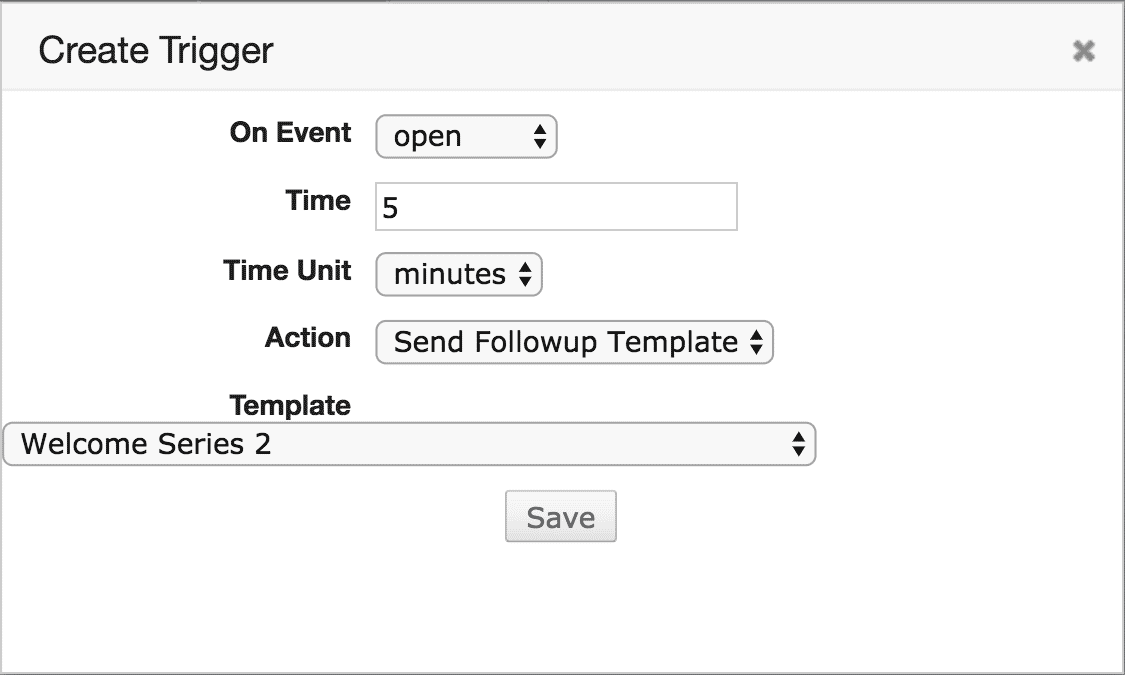
Set up the options for the trigger in the dialog box that comes up:
- On Event- As noted above, there are five events upon which the trigger can be executed, including: open, click, purchase, send, and cancel.
- Time - When to execute the follow-up trigger,such as 2 hours after subscriber opens.
- Time Unit - Can be minutes, hours, or days. We recommend not exceeding a time unit of 365 days.
- Action - What action the trigger should take. Options include: send follow up email, add subscriber to another list, or execute a custom Zephyr script.
- Template - If the action is to send a follow up email, select the triggered email to be sent here.
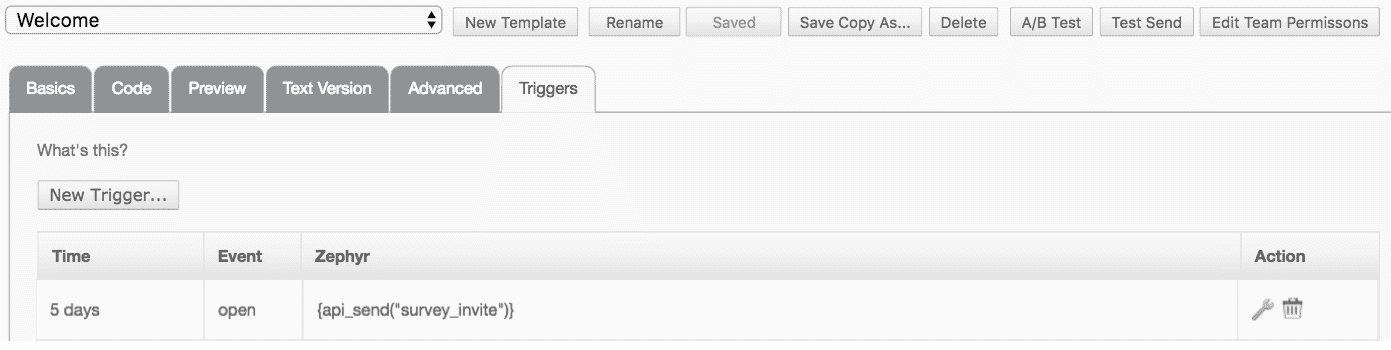
Below, the trigger will be executed (survey_invite template will be sent) 5 days after the user opens the original triggered email (welcome template).
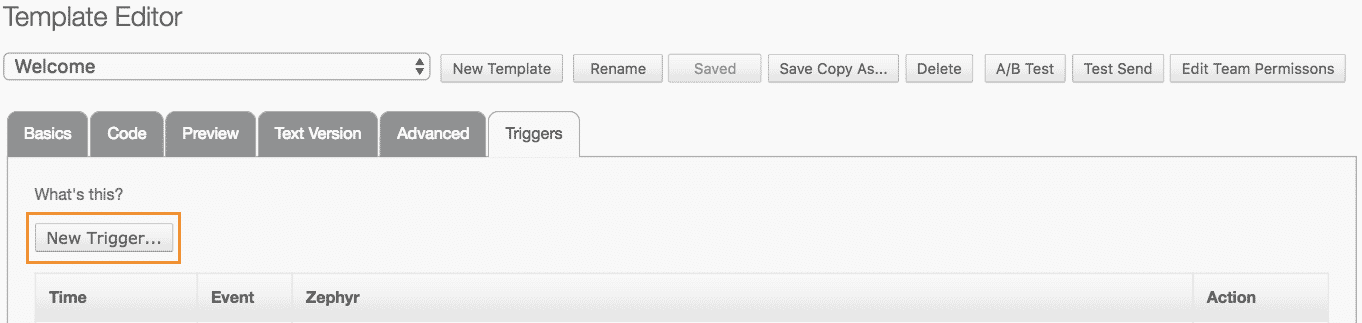
You can check the triggers you have set up on a template by navigating back to the Triggers tab on that template. Here you can edit and remove the triggers as well as view information on them.
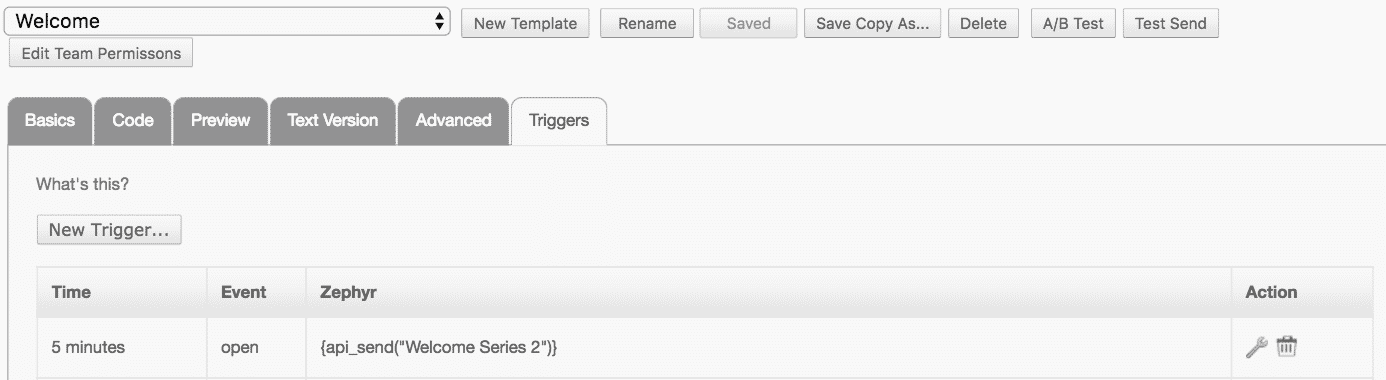
- Time - The time after the event when the trigger will be executed.
- Event - The event that starts the timer to execute the trigger.
- Zephyr - The Zephyr script (customizable; see below) that executes the trigger.
- Action - Edit an existing trigger by clicking the wrench icon. Remove an existing trigger by clicking the trash can icon.
Cancel Trigger Example
Consider the case of a client who wishes to send Receipt Template A, except in the case of a user's fifth purchase, in which case a different receipt template should be sent including a 50% discount coupon (Receipt Template B).
The following code could be included in the Setup field of the Template Editor's Advanced tab:
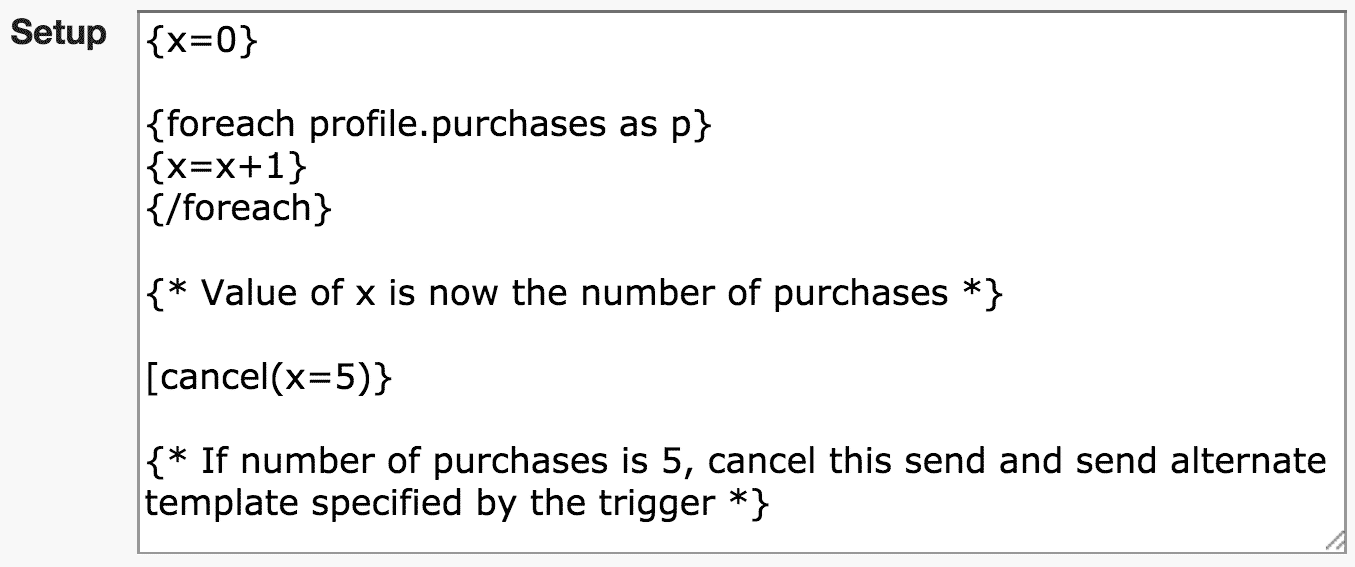
And the following Cancel trigger specified:
On the user's fifth purchase, Receipt Template A will be cancelled and Receipt Template B will be automatically sent in its place.
Custom Zephyr Script
A trigger's possibilities are immensely increased when used with a Zephyr custom script. There are two special functions you can include with a trigger:
Making use of profile and message objects along with Zephyr can be quite powerful.
Please click here for examples of custom Zephyr scripts.
Deleting a Trigger
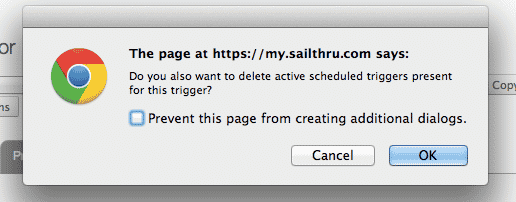
If you no longer need to keep a Trigger active, it can be deleted by navigating to the Triggers tab in the template editor. From the Triggers tab, click the trashcan icon. You'll be prompted to confirm if you want to delete the Trigger.
If you have any Triggers that haven't executed yet, you'll be prompted to confirm if you want to delete any scheduled Triggers that haven't executed yet. Clicking "Cancel" deletes the Trigger from the template, but keeps the scheduled Triggers; Clicking "OK" deleted the Trigger from the template and the scheduled Triggers.