Build a Signup Page
Contents
New subscribers should be collected on a signup page. Email addresses and SMS numbers will be added to the List that you designate, and any personal data you collect will be added to individual user profiles as custom fields.
An example signup page comes pre-configured in your account. To add signup functionality to your own site, you can instead use our JavaScript API or HTML sign-up forms. Notes:- By default, the system automatically detects Custom Field Value types. If your account was created before January 2019, talk to your CSM or to Support to enable this feature.
- To protect you from bot signup, ReCaptcha is automatically enabled on Hosted Sign Up pages. If you don't see ReCaptcha on your page, contact your CSM or Support for assistance.
- You must use the system-provided ReCaptcha. Your own ReCaptcha service will not work with a hosted signup page. If you don't have ReCaptcha on your signup pages, contact your CSM or Support.
- When rendering a hosted page within an iframe, we recommend that the hosted page domain has the same domain as the website in order to avoid clickjacking. Verify your hosted page domain in the application (Settings > Setup > Domains). If you'd like to restrict using other websites that do not belong to your domain from rendering hosted pages in an iframe please contact Support.
Required
- Checkboxes, radio buttons, and drop-downs for any cases where a user will sign up for multiple lists.
- An input tag with
name="email"orname="sms"to collect the subscriber's messaging information. - Form HTML must begin with
<form method="post">. - For SMS capture, an opt-in checkbox. See more in the SMS Capture section.
- A 'submit' button must be used to save user data.
Optional
- You may use nested variables on an input. For example:
<input type="text" name="vars[parents_kids][age]"/>
Build a Page
- From the Content tab, select Hosted Pages.
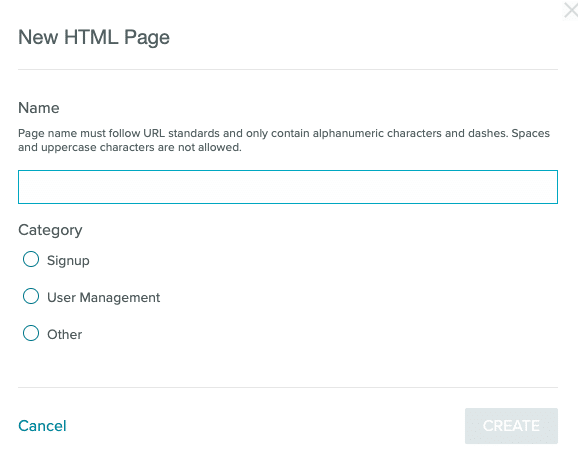
- Select the New Page button when the Hosted Pages list page opens.
- The Name of the new page will be part of the URL, so name it something user-friendly. For Category, select "Signup."
- Use the tabs described in the following topics to code and configure your page.
Actions
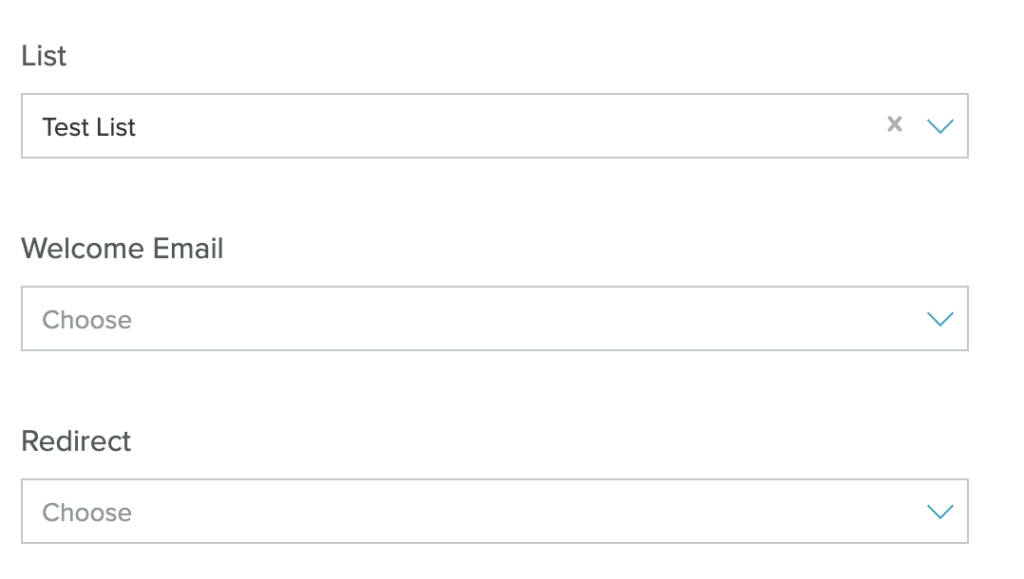
The Settings allow you to select:- List - the list the subscriber will become a part of (for multiple lists, see Inputs below). Only Primary Natural Lists can be used currently.
- Welcome Email - choose the transactional email the subscriber will receive (this must have been created in templates)
- Redirect - page to redirect to e.g. a "thank you" page (this must already exist in Hosted Pages in order to appear in the drop-down)
HTML Form Inputs
In the Code tab, drop your HTML and CSS. View the final product in the Preview tab.- Create the HTML input form in which a subscriber will enter their information.
<form method="post"> </form> - Add an input tag with the field name set as email or SMS.
<input name="email" type="text" style="width: 400px; height: 25px;" data-validation="required email"/> <input name="sms" type="text" /> - Add a way for users to submit their information. This HTML adds a submission button with text that reads SIGN UP.
<input type="submit" name="submit" id="sign-up" value="SIGN UP" /> - When complete, the form HTML will resemble the following:
For email:
For SMS:<form method="post"> <input name="email" type="text" style="width: 400px; height: 25px;" data-validation="required email"/> <input type="submit" name="submit" id="sign-up" value="SIGN UP" /> </form><form method="post"> <p>SMS: <input name="sms" type="text" /></p> <input type="submit" value="Enter" /> </form>
Multiple List Sign-up
If you have multiple lists, you'll need to add an input tag with the name of that list as a key in the lists array:name="lists[my_other_list_name]"
For example:
<input name="lists[daily]" style="margin-left: 15px;" type="checkbox" checked="checked" /><label for="box1"> Daily Newsletter</label>Track Sign-up Source
To track the source of new signups and see reporting in the Source Report, add thesource variable to your code. The source variable is attributed to the value.
<input type="hidden" name="vars[source]" value="myvariablename" /><form method="post">
<input type="text" name="email" />
<input type="hidden" name="vars[source]" value="contest" />
<input type="submit" value="Subscribe" />
</form>SMS Capture
Capture SMS numbers from a signup page and message users on their preferred channel.SMS Consent
To align with TCPA (Telecommunications Protection Act) regulations, customers must obtain consent for transactional and marketing messages separately. Capturing consent cannot be tied to a single checkbox. The text must also contain explicit language around the use case the consent is tied to (e.g. "I would like to receive marketing messages." or "I would like to receive updates.")SMS Requirements
- An input field with
name="sms" - For marketing consent, a field with
name="sms_marketing_status"andvalue="opt-in" - For transactional consent, a field with
name="sms_transactional_status"andvalue="opt-in"
SMS Examples
Use the HTML examples to build an SMS capture page. Note: Non-US and non-Canadian profiles must enter "+[country code]" when submitting their SMS numbers to have their number captured and to receive messages. You may wish to add a reminder to your SMS signup page.SMS Number and Consent Capture
There are a few ways to capture user consent in a form. --> Radio Button Example<form method="post">
<p>SMS: <input name="sms" type="text" /></p>
<p>Send Transactional SMS
<label><input type="radio" name="sms_transactional_status" value="opt-in" />Yes</label>
<label><input type="radio" name="sms_transactional_status" value="opt-out"/>No</label>
</p>
<p>Send Marketing SMS
<label><input type="radio" name="sms_marketing_status" value="opt-in" />Yes</label>
<label><input type="radio" name="sms_marketing_status" value="opt-out"/>No</label>
</p>
<input type="submit" value="Subscribe" />
</form><form method="post">
<p>SMS: <input name="sms" type="text" /></p>
<p>Send Transactional SMS
<select name="sms_transactional_status">
<option value="opt-in">Yes</option>
<option value="opt-out">No</option>
</select>
</p>
<p>Send Marketing SMS
<select name="sms_marketing_status">
<option value="opt-in">Yes</option>
<option value="opt-out">No</option>
</select>
</p>
<input type="submit" value="Subscribe" />
</form>How-to Video for SMS Capture
Page URL
Note that the default URL will begin with cb.sailthru.com unless you add a Link Domain to your Settings page. You can find the URL for your page listed on the main Hosted Pages interface. Is a Link Domain required?
It's not required, but is highly recommended; if you choose not to use it, rewritten links within your emails will point to
Is a Link Domain required?
It's not required, but is highly recommended; if you choose not to use it, rewritten links within your emails will point to http://cb.sailthru.com instead of your own domain. The purpose of the Link Domain is to have your links appear as if they are from your site.
We rewrite all links (see Link Tracking) so we can track your clicks for metric reporting. If you have a Link Domain, links will be rewritten using that. For example: http://link.mydomain.com instead of http://cb.sailthru.com.
Note also that a Link Domain is required if you wish to use the Purchase API.
Last, please note that if you ever decide to change your Link Domain, you should not delete the old one in your settings or links will break in old emails. Instead add the new one to the field separated by a comma. For example: link.mydomain.com,newlink.mydomain.com.