Custom Font Management
Contents
Add your custom fonts through the UI and keep your visual templates on-brand.
Getting Started
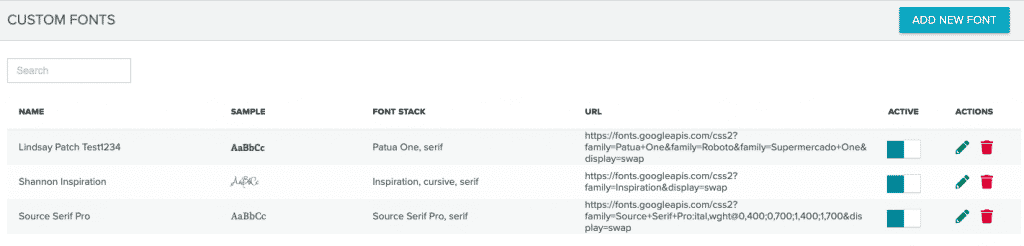
To locate your custom fonts, navigate to the Custom Fonts page from the My Account menu (My Account > Settings > Custom Fonts). When the page loads, you'll see a list of your fonts. If you had custom fonts added manually in the past, they should appear in the list on the Custom Font page. From the Custom Fonts page, you can add a new font, search for existing fonts, activate or deactivate fonts, edit a font entry, or delete a font. The page also gives you basic information for each font added.

| Column | Description |
| Name | The name given to the font when added. |
| Sample | A sample of the font. |
| Font Stack | The custom font and any backup fonts you added. |
| URL | The public link for the added font. |
| Active | A toggle to activate or deactivate the font. |
| Actions | The tools to edit or delete a font entry:
|
Public Font Links
Before adding a custom font, you need the public link to the font. This section covers finding the public font link in Google Fonts and in Typescript, since those two are the most commonly used. Note: You must use the public link for a font. If you try to add a font and see a CORS error, contact your IT department to have the font link made public.Google Fonts
- From https://fonts.google.com/, search for and select the font you'd like to use.
- On the font page, under Styles, select Select this style. This will open more information in the Selected family panel to the right.
- Locate the link under Use on the web. Select the link from the href= section.
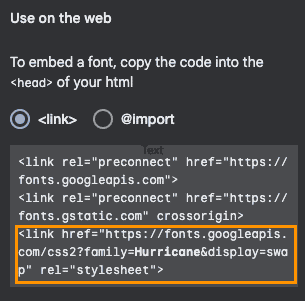
https://fonts.googleapis.com/css2?family=<b>Hurricane</b>&display=swap
Typekit
Use new fonts- While searching for a font, click the </> icon on the font you'd like to use.
- Add the font to an existing project or create a new one.
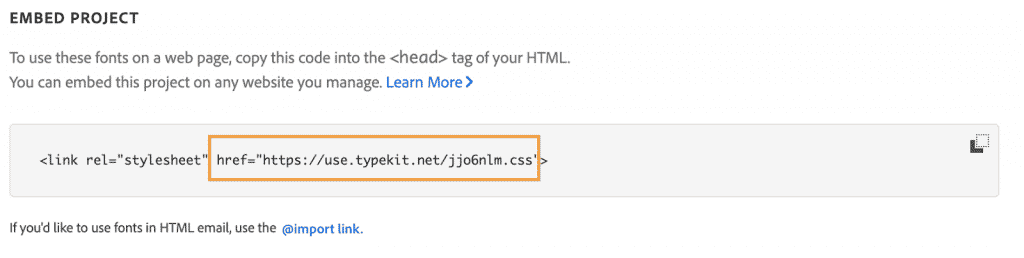
- Copy the URL inside the href field to grab the CSS file.
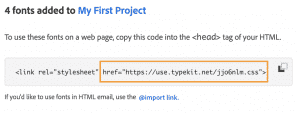
- Go to Web Projects and find the list of fonts you'd like to use.
- Copy the URL inside the href field for the project to grab the CSS file.
Add a Font
To add a custom font, navigate to the Custom Fonts page from the My Account menu (Settings > Setup > Custom Fonts).- Select the Add New Font button to open the Add Font modal.
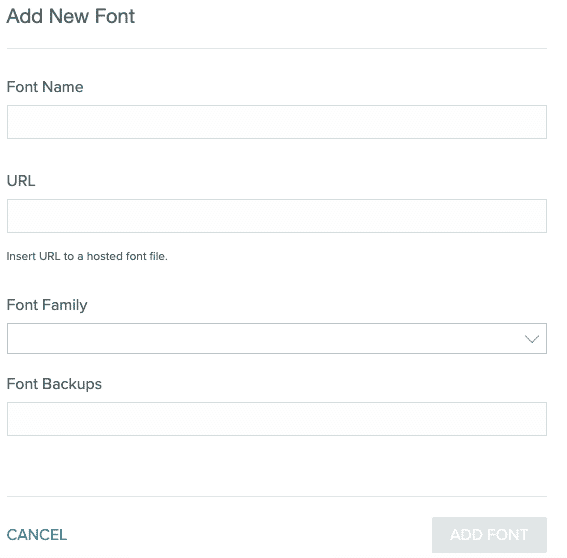
- Give your font a name. This doesn't need to be the formal font name; it can be anything.
- Paste the public link you copied in Getting Started into the URL field.
- The Font Family dropdown will populate automatically after clicking out of the URL field. Check the dropdown and select the correct font.
- Add a safe font (for example, Arial) or a font type (sans-serif, cursive, etc.) to the Font Backups field. This allows for a fallback font if your selected font doesn't load.
Note: If you wish to add more than one backup font, list them by order of preference and use commas to separate the font names as in the following image:
- Select Add Font. Your font should show in the list and be available in Email Composer.
Edit a Font Entry
From the Custom Fonts page, locate the font you wish to edit.- Select the pencil icon
 under Actions to open the Edit Font modal.
 - Make edits to any of the fields.
- Select Save.
Use a Custom Font
Use custom fonts in Email Composer templates. To use a custom font:- Open an existing template or create a new one.
- Add a block to your template that contains text or select the text in an existing block.
- Depending on the type of block selected, you'll find custom fonts in the following areas:
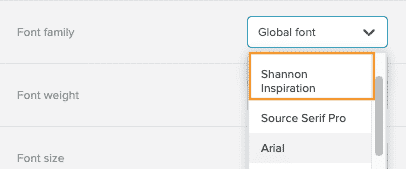
- Title block
Custom fonts are available in the Content Properties panel under Font family. It will show the custom name for the font.
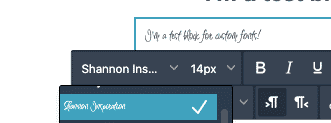
- Text block
Custom fonts are available in the floating editor. While scrolling through the fonts, you'll see a sample of the font in the editor.
- Title block
Custom fonts are available in the Content Properties panel under Font family. It will show the custom name for the font.
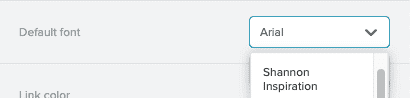
- To set a custom font as the default, select the Settings tab. Select the font from the Default font dropdown menu:
Font variations and styles
The release of the Paragraph and List content blocks in Email Composer has made it possible to use variations of custom fonts - including font weights! However, there are some limitations associated with this. At this time, Email Composer is only programmed to recognize certain font variations:- Regular (typically a font-weight of 400)
- Bold (typically a font-weight of 700)
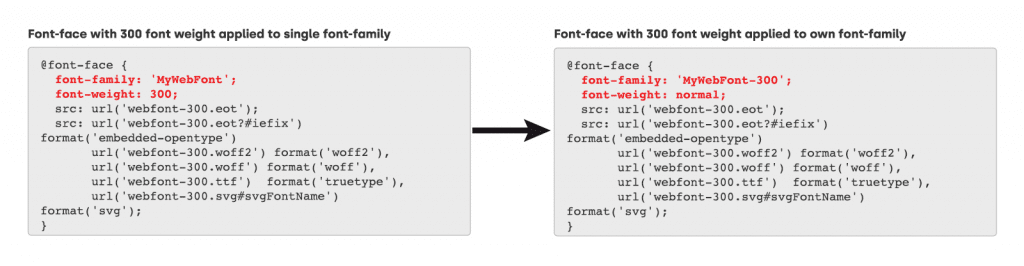
If you're interested in using other font weights with custom fonts from files that you host, you will need to customize the font-face file and the CSS file to have a unique font-family name for each weight. For example, when creating a font-face file for a font that typically has a weight of 300, you'll need to create a font-family that's unique to that weight. Then you'll need to ensure that the unique font-family name has the weight property set to normal.
Web font and font variation support
Web fonts and font weights that are not regular (400) or bold (700) may not be supported by some email clients. Even if a custom font does appear in the template, it can be stripped when it is rendered in your subscriber's inbox by the email client. Here's a quick overview of web font compatibility for some of the most popular email clients:
| Desktop clients | |
| Email client | Compatible? |
| Apple Mail | Yes |
| Thunderbird | Yes |
| Microsoft Outlook for Mac (2011, 2016) | Yes |
| Microsoft Outlook for Windows (2007-2016) | No |
| Web clients | |
| Gmail | No* |
| Outlook.com | No |
| Office 365 | No |
| Yahoo | No |
| Mobile clients | |
| Gmail (iOS & Android) | No* |
| iOS Mail (iPhone & iPad) | Yes |
| Outlook (iOS & Android) | Yes |
| Samsung Mail | Yes |
| Yahoo (iOS) | Yes |
| Yahoo (Android) | No |
* Gmail supports Open Sans and Roboto Note: Custom fonts will appear when previewing the template in Email Composer as it utilizes the browser to render the preview. For a more accurate view of what the template will look like in each client, please use the Email Client Test option.