WordPress Plugin
Contents
Sailthru's WordPress plugin has been created to get you up and running with your Sailthru account quickly. Its core features will allow you to add the Sailthru JavaScript tag and enable WordPress widgets to personalize the site content and capture user list signups.
Download and Install
The latest version of the plugin is available to download from WordPress.
WordPress VIP platform users can install the plugin from the VIP shared plugins folder.
Configure
Best Practice: Connecting your Sailthru account with a third party vendor requires a 3rd party API Key and Secret. For your account security, you should use a different Key and Secret for each integration. Contact support to request an integration-specific Key and Secret.Once you have enabled the plugin, click the new Sailthru link on the left-side menu of the WordPress admin interface, then click the button labeled Add Your Sailthru API & Key.
This release of the plugin adds support for the Sailthru Content API so that the metadata of all your pages, posts, and other content types is pushed to Sailthru when they are created or updated. This will require you to enter your API credentials.
Enter your API Key and Secret (available on your Settings page in My Sailthru), then select a Sailthru JavaScript Version. You can switch JavaScript tag versions after setup, but please note that the legacy Horizon JS will be deprecated from the plugin in early 2018.
The use of the Sailthru JavaScript tag will disable the plugin's legacy Scout and Concierge settings available under Horizon, and a WordPress widget will provide the ability to render a Site Personalization Manager section on your pages, instead. Speak to your customer success manager about getting set up with Site Personalization Manager and this powerful functionality.
Click Save Changes.
If Using Sailthru JavaScript Tag
The JavaScript tag can be deployed in Simple or Custom Mode. In most cases, Simple Mode is ideal. For more details on each mode, see the Sailthru JavaScript Options table. Simple Mode To deploy the Sailthru Script Tag in Simple Mode choose Sailthru Script Tag from the drop-down. When you click Save Changes, the JavaScript tag will be deployed to all pages automatically.Custom Mode
Using Custom Mode enables more control over the functionality of the tag and also enables you to use Site Personalization Manager. Choose Sailthru Script Tag (custom mode) from the drop-down and click Save Changes. When the page is saved and reloads review and complete the following additional fields below the drop-down:
- Autotrack Pageviews - Select "Yes" to automatically track pageviews for each page. This is advised.
- Use Stored Tags - Unless you have disabled the Content API using a filter then this should normally be set to "Yes". This setting will track user interests based on the stored content in Sailthru. If set to no, then it will use the values from the meta tags on page.
- Exclude Content - The default setting is "No". Setting this to "Yes" will exclude any content from Sailthru recommendations.
Then, click Save Changes. The JavaScript is now added and properly configured on all of your pages, to enable Sailthru's Personalization Engine for your site.
Note: If you have whitelisting of IP addresses for API access enabled on your Settings page, then you will need to add the IP for your WordPress site's server if it is not already included.
If Using Legacy Horizon JavaScript
Complete/review the following additional fields:
- Sailthru Horizon Domain - Add the Horizon Domain from the My Sailthru Settings > Domains page.
- Horizon Loading - Select if you want to load the JavaScript synchronously or asynchronously
Then, click Save Changes. The Horizon JavaScript is now added and properly configured on all of your pages.
Note: If you have whitelisting of IP addresses enabled on your Settings page, then you will need to add an IP for your WordPress site if it is not already included.
Using an External Tag Manager
If you are using an external Tag Manager such as Google Tag Manager or Tealium, you can disable the deployment of the Sailthru Script Tag by not selecting anything in the drop-down. Choose "Select" to remove any any existing deployed script tags.Sailthru Meta Tags
Simply by adding your Sailthru account settings you're already ready to go with Personalization Engine. The plugin will automatically add the necessary JavaScript to the footer of your theme. We'll also automatically add the necessary Sailthru Meta Tags to your page for you. When you tag a piece of content in WordPress you won't have to worry about adding those meta tags to the post/page, it'll be there for you.
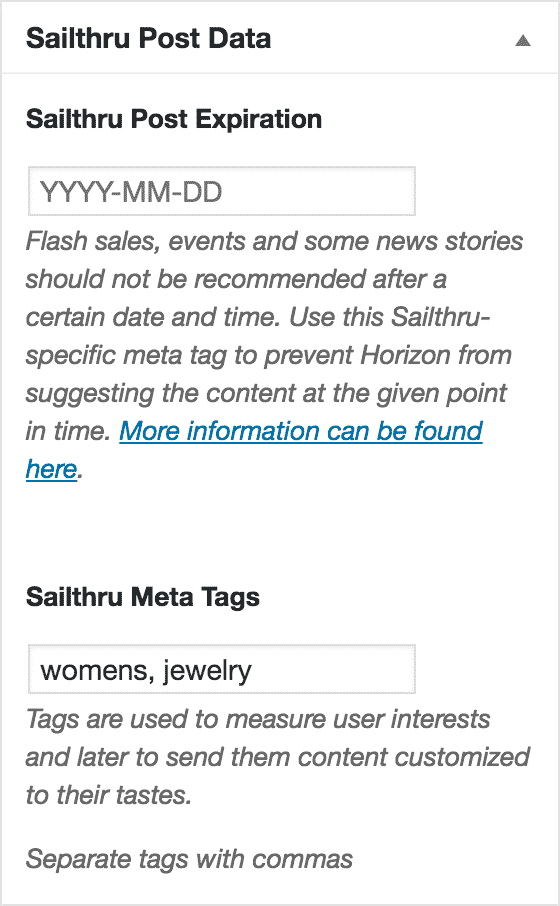
For tagging content the plugin will use the default WordPress tags field available when you are creating or editing content. For more control over the tags you send to Sailthru, there is also a Sailthru Meta Tags field on the page which will be used instead of the WordPress tags field if it has comma separated tags present. This is often desirable when your WordPress tags are best suited for other purposes, such as SEO, but not as well-suited for content filtering and user-interest tagging in Sailthru.
If neither the WordPress tags field or Sailthru Tags field are completed, then we will default to using the category selected in the post/page as the lone content tag for Sailthru.
This will load for posts, custom posts and WordPress pages.
Expiring Content
Sometimes you do not want your content displaying in future recommendations. So for each post/page you'll be able to set the content expiry date. This will tell Sailthru to remove this piece of content from Sailthru recommendations after the set date.
Deleting Content
When you send content to the trash in WordPress, it will also be deleted from your Content Library in Sailthru.
Concierge Setup (for Legacy Horizon JS only)
Concierge is a Personalization Engine-powered on-site recommendation tool, allowing a small "slider" to appear in a user's browser window at the end of an article. The slider will suggest another story based on a user's interest. (The recommended method for implementing this feature is now to use the new Personalize JavaScript with Sailthru's Site Personalization Manager. This offers the same display to your visitors, but with a wide array of additional options for configuration and metrics.)
To enable Concierge on your site click on the Concierge tab and check the box and click save. Once enabled you'll be presented with a simple form to configure Concierge behavior.
For full documentation on Concierge options check out the Concierge documentation page. The plugin simple makes those options available via a form.
Scout Setup (for Legacy Horizon JS only)
Scout is an on-site tool that displays relevant content to users when viewing a particular page. The tool is powered by Sailthru's Personalization Engine intelligence, which gathers data on your users' individual interests, based on activity on your website, mobile device and tablet, all tied to each user's email address.
To enable Scout on your site click on the Scout tab and check the box to enable it. You'll be presented with a screen allowing you to configure the options via a simple form.
Widgets
The Sailthru plugin provides two widgets. The first "Sailthru Recommends" is a widget that displays recommended content via Scout. If you've enabled Scout then you'll be able to use this widget anywhere your theme allows you to place content. The content provided by Sailthru Recommends is powered by Personalization Engine and so recommends content based on the Personalization Engine domain field that you provide in the plugin settings screen.
Subscribe Widget
We've also provided a simple "Subscribe" widget which you can use to easily provide signup for newsletters. You'll be able to add users to one or more lists when they sign up. Quick and easy.
By default the widget displays an email field but you can add additional fields to the widget if you'd like to gather more information from your subscribers. To use this feature click on the Subscribe Widget Fields in the Sailthru admin screen.
The screen displays any fields you have already configured and a form to easily add new ones. Any fields added to the admin will be available to all widgets. You can add a number of different HTML fields that can be used for different types of information, for example a "select" field can be used for data like gender.
Text fields are used to collect information where the user will type in their answer, select fields are drop down fields that can be used for fields like State or Country. Hidden fields are not visible to the user but allow you to gather information that might be important to you such as the source of the campaign.
Widget Instance Options
Each individual widget can be set to use different fields, fire a different event and track a different source. For example if you want to fire an event in Lifecycle Optimizer only in a signup from the footer you can name that event differently than a sidebar.

Each individual widget can also add users to different lists. This gives you the full flexibility on what form fields are displayed for user information and what list those users go to. As a list add can also start a Lifecycle Optimizer flow the subscribe widget is a great way to acquire new users and add them to new flows.
Use ReCaptcha and Reset Optout Status
Safely re-engage previously opted out users from your WordPress site and prevent malicious bot signups with ReCaptcha. These features are available in version 3.4.0 and later of the Sailthru WordPress plugin.Use ReCaptcha
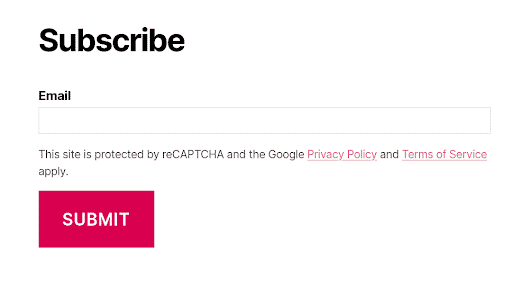
Automatically integrate ReCaptcha into your Sailthru WordPress signup forms. Activate ReCaptcha through the Sailthru section of your WordPress Admin dashboard.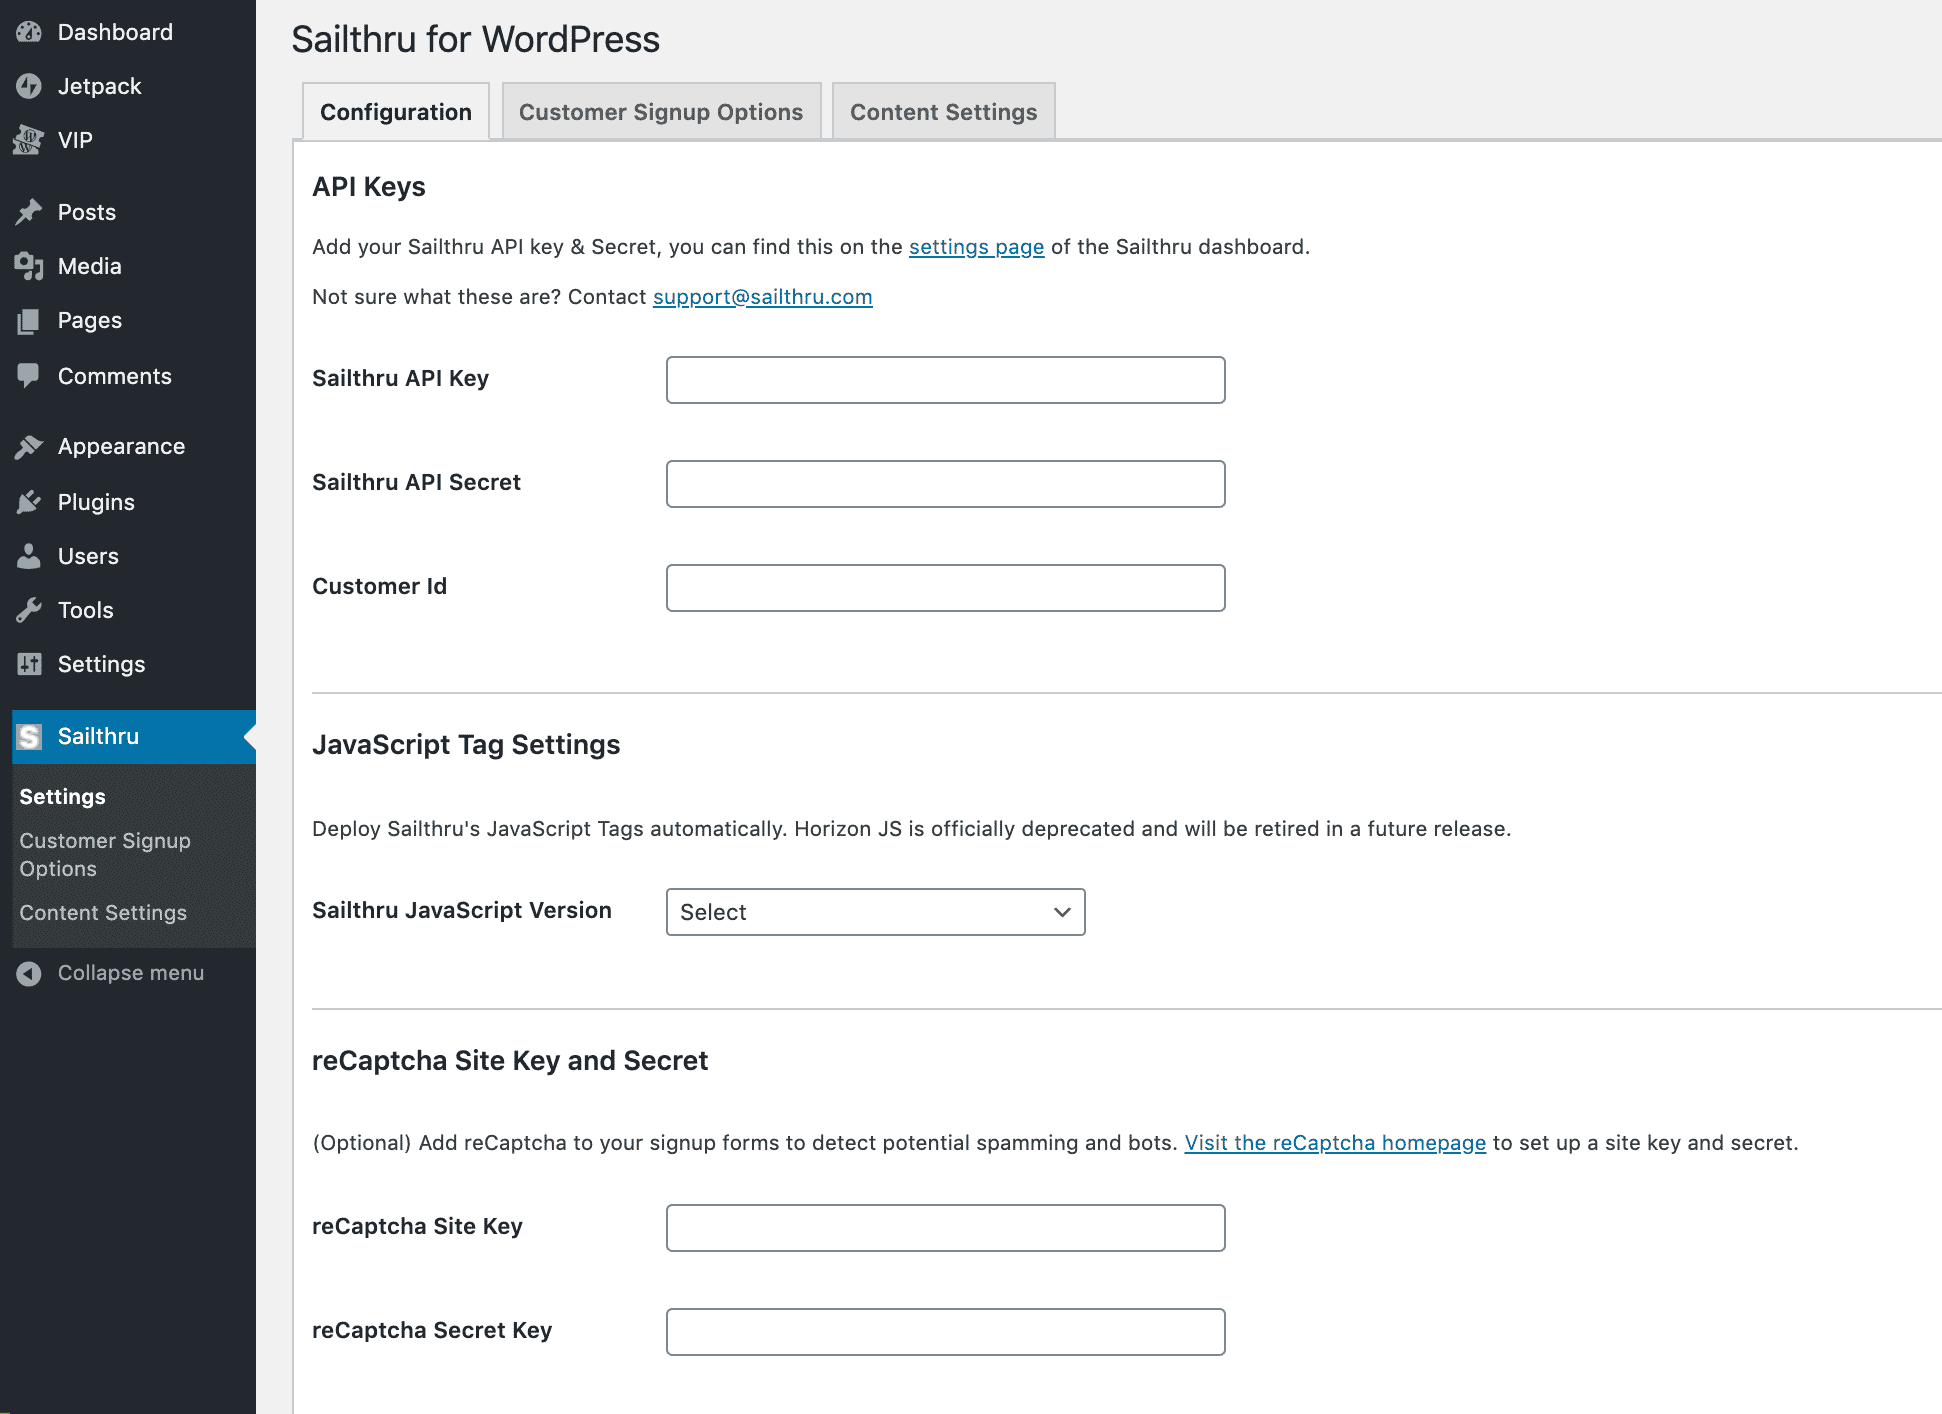
- Create a new ReCaptcha v3 key.
- Select Settings from the Sailthru section of your WordPress Admin menu.
- In the Configuration tab, scroll down to the reCaptcha Site Key and Secret section.
- Enter your Site Key and Secret in the fields and save your changes.
- When you create a subscription page, it will appear like the following image:
Revalidate Opted Out Users
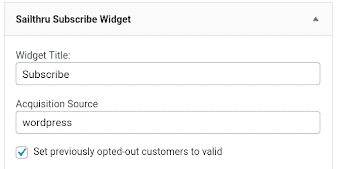
Reset customer opt-in when a previously opted-out customer creates a new signup. To configure this option:- Open your Widgets settings in your WordPress Admin dashboard and locate your Sailthru Subscribe widget.
- Click the checkbox Set previously opted-out customers to valid.
- Save the widget.
Shortcodes
The subscribe widget is available as a shortcode too using the following syntax.
[sailthru_widget fields="names,of,fields" sailthru_list="list_name"]
|
Parameter |
Description |
Values |
|
fields |
Comma separated list of field names as displayed on the Subscribe Widget Fields admin screen. [sailthru_widget fields="names,of,fields" sailthru_list="list_name"]
|
field name(s) |
|
modal |
Display widget as a modal window [sailthru_widget fields="names,of,fields" modal="true"]
|
(optional) true or false |
|
sailthru_list |
comma separated list of lists to add the user to [sailthru_widget fields="names,of,fields" sailthru_list="list_name"]
|
list name(s) |
Sailthru Personalization Engine Widget
This widget gives you the option to render a Site Personalization Manager section directly on your page, combining the power of Sailthru's personalization and WordPress's drag and drop interface.
When you select Personalization Engine Javascript as the option this widget will allow you to select from your available SPM sections.
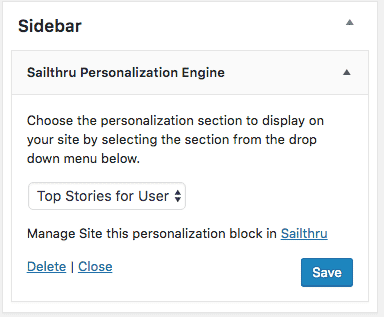
You'll find both these widgets in WordPress's Widgets section.
Filters
WordPress themes provides a method to override some of the plugin's default features. For example you may not want to include a specific sailthru tag like a date. Or you want to combine the sailthru meta tags with the category tags.
The plugin has three tags to allow developers to customize the output of Personalization Engine meta tags. You can use these filters within your theme's functions.php file. If the file does not exist you can create it. For more information see the WordPress documentation on filters.
sailthru_horizon_meta_tags_enable returns boolean false to prevent the Sailthru Engine meta tags from outputting. Useful when you wish to rely on the fall back meta tags or manually output your own.
sailthru_horizon_meta_tags is supplied an array of the name/content attributes of the meta tags. This is helpful if, for example, you need to update the value of sailthru.author when using a plugin like co-authors-plus, or for swapping out sailthru.tags for categories or a terms from a custom taxonomy.
sailthru_horizon_meta_tags_output this filter acts on each meta tag, allowing you to edit each html tag.
sailthru_content_api_enable this filter allows you to disable the Content API by returning false. For example you may wish to do this for a specific content type.
sailthru_user_registration_enable this filter, when enabled, will automatically create a user in the WordPress site when a subscribe widget is completed, the end user will receive a reset password link from WordPress as if they had signed up through a normal signup.sailthru_content_vars this filter, when enabled, allows you to modify custom fields coming to Sailthru with published posts.
See the examples below for more context.
Manipulating the Sailthru Meta Tags
If you want to manipulate the tags that are sent to Sailthru with the Content API call you can use this filter to do things like combine tags from WordPress categories with the Sailthru tags for a post. Or if you have a specific tag you want to always use, for example "blog" for all blog posts.
// Filter to be used to manipulate all the tags,
// for example to combine category and WP tags with Sailthru tags
add_filter('sailthru_horizon_meta_tags', 'sailthru_combine_horizon_meta_tags',  1);
function sailthru_combine_horizon_meta_tags($tags) {
   // category of post/page/other content item
   $category = get_the_category();
   // wordpress tags of post/page/other content item
   $wp_tags = get_the_tags();
   // manipulate the information in the $tags variable as they wish and return it
   return $tags;
}
Manipulate an Individual Meta Tag
In this example the sailthru.date meta tag is being removed from the output.
// Filter to be used to manipulate an individual tag.
// For example, this can be used to remove a tag.
add_filter('sailthru_horizon_meta_tags_output', 'sailthru_filter_tag');
function sailthru_filter_tag($tag) {
   if (strpos($tag, 'sailthru.date')) {
      // this will return false and so not display the sailthru.date meta tag
      return false;
   }
   return $tag;
}
Disable the Sailthru Meta Tags
This filter allows you to disable the Sailthru Meta Tags from being used on a page. If you are disabling meta tags on the page please make sure you are still using the Content API to provide interest tags.
// Disable Personalization Engine tags, useful if you are creating tags yourself.
add_filter('sailthru_horizon_meta_tags_enable', 'sailthru_enable_horizon_tags');
function sailthru_enable_horizon_tags() {
 return false;
}
Disable the Sailthru Content API
This example returns false which will completely disable the Sailthru Content API from firing when the post is saved.
add_filter('sailthru_content_api_enable', 'sailthru_content_api_enable');
function sailthru_content_api_enable() {
 return false;
}This filter allows to to choose where you load the localized JS file tag.js which contains the logic for the Sailthru Javascript Tag and sets the customerId and JS version to use. By setting this filter to return a true value the tags will be loaded via wp_footer() rather than the default wp_head().
add_filter( 'sailthru_scripts_in_footer', '__return_true' );Disable API verification
During setup your Sailthru API keys are verified and the plugin functionality is enabled based on a valid response. If for any reason you wish to disable this temporarily you can apply this filter. This will disable a check to our settings API and allow you to enable the plgin functionality. Please note that we cannot guarantee full functionality at this point as the verification may have been due to an invalid key.add_filter( 'sailthru_disable_api_verification', '__return_true' );
Create a WordPress User Account
This example returns true which will create the user in WordPress when they signup via a Subscribe Widget.
add_filter('sailthru_user_registration_enable', 'sailthru_user_registration_enable');
function sailthru_user_registration_enable() {
 return true;
}
Modify Custom Fields for Posts
This filter allows you to add any data you'd like to WordPress posts in your Sailthru Content Library. Use your new custom fields to render dynamic data in your message templates or to segment your posts into Content Feeds for personalized recommendations.
The sailthru_content_vars filter passes two arguments to your function:
- vars - array of plugin-generated custom fields
- post - the WordPress post object
function add_helloworld( $vars, $post ) {
$vars['hello'] = 'world';
return $vars;
}
add_filter( sailthru_content_vars, 'add_helloworld', 10, 2 );